plumbing

24Apr

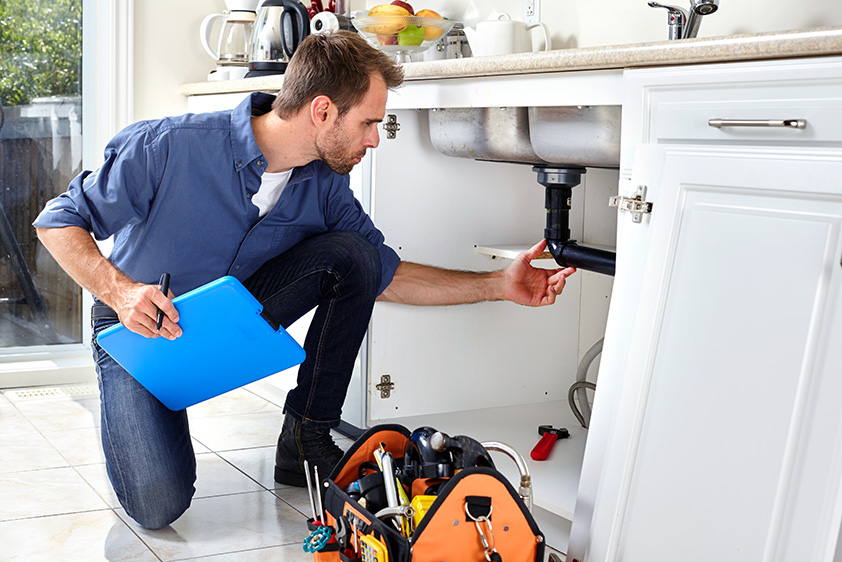
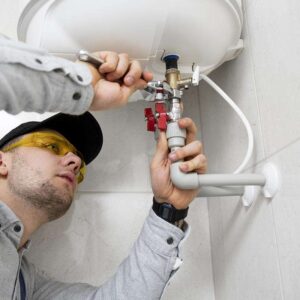
Signs It’s Time for a Hot Water Tank Replacement

A hot water tank replacement usually becomes necessary when your current unit can’t keep up anymore. You may notice leaks around the base, rusty water, strange noises or water that runs cold too quickly. In many homes, these warning signs show up as the unit gets older and less reliable.

If your system is more than 8 to 12 years old, it may be smarter to plan for water heater replacement before a major failure causes damage. Waiting too long can leave you without hot water and may also lead to water damage around the tank.

Water Heater Replacement or Repair: How to Decide

Not every problem means you need a full replacement. In some cases, a repair can get your system working again. Still, repeated repairs, inconsistent heating and visible corrosion often point to the need for a new unit.

When comparing repair with water heater installation, think about long-term value. A newer unit can improve performance, reduce breakdowns and give your household more dependable hot water. For homeowners who want fewer service calls and better day-to-day comfort, replacement is often the better investment.

Cost to Replace Hot Water Heater Systems

For homeowners in Santa Maria and across Southern California, the cost to replace hot water heater systems can vary quite a bit based on the type of unit, the installation setup and any code upgrades required. As a rough local benchmark, a standard tank replacement often lands around $2,000 to $4,300 installed, while a tankless water heater upgrade is often closer to $4,000 to $7,500 installed. California pricing sources also note that Santa Maria-area tank units may start lower in simpler situations, with local estimates showing about $800 to $2,500 for the tank itself and $50 to $300+ for permits and inspections, before factoring in labor and any job-specific upgrades.

The final price usually depends on tank size, gas or electric setup, venting, access to the unit and whether your home needs updates to meet current code. A straightforward swap in the same location will usually cost less than a job that involves new venting, plumbing changes or a move to water on demand with tankless equipment. That’s why the most accurate number comes from an in-home inspection, not a one-size-fits-all online estimate

Choosing the Right Size for Hot Water and Water Usage

A replacement should match your home’s daily demand. If your household uses a lot of hot water in the morning or evening, the wrong size can lead to frustration fast. Looking at water usage helps determine whether you need a larger tank, faster recovery or a different system design.

A small household may do well with a standard tank that offers steady performance and lower upfront cost. A larger household may need a system that delivers more hot water without running out during peak times.

Tankless Water Heater vs Traditional Tank

For some homeowners, a traditional tank is the most practical choice. It offers familiar performance and can make water heater installation simpler when you’re replacing an existing unit with a similar model.

For others, a tankless water heater is worth a closer look. These systems provide water on demand, which means they heat water as it’s needed instead of storing it in a tank. They can save space and may be more energy efficient over time. Still, switching to tankless may require upgrades to venting, gas lines or electrical service, so it’s important to compare both options carefully before making a decision.

Service / ComponentStandard Tank SystemTankless (On-Demand)
Unit Cost$800 – $2,500$1,500 – $3,500+
Professional Labor$600 – $1,800$1,500 – $4,000
Permits & Inspections$50 – $300+$100 – $500
Total Estimated Price$2,000 – $4,300$4,000 – $7,500+

Energy Efficient Water Heater Installation Benefits

New models are often far more energy efficient than older ones. That can mean lower monthly bills and more reliable performance. A new unit may also heat faster, recover more efficiently and deliver more consistent hot water throughout the day.

If you’re thinking about overall home efficiency, it also helps to look at related systems. For example, homeowners comparing comfort upgrades may also want to read about heating choices when planning future improvements.

Protecting Your System From Hard Water and Sediment

Water quality plays a bigger role than many homeowners realize. Hard water can create mineral buildup inside the tank, which affects heating performance and shortens equipment life. Sediment can also collect at the bottom of the tank and make the unit work harder than it should.

If you suspect mineral issues in your home, take a look at hard water signs. Catching those problems early can help protect your new system and improve long-term performance.

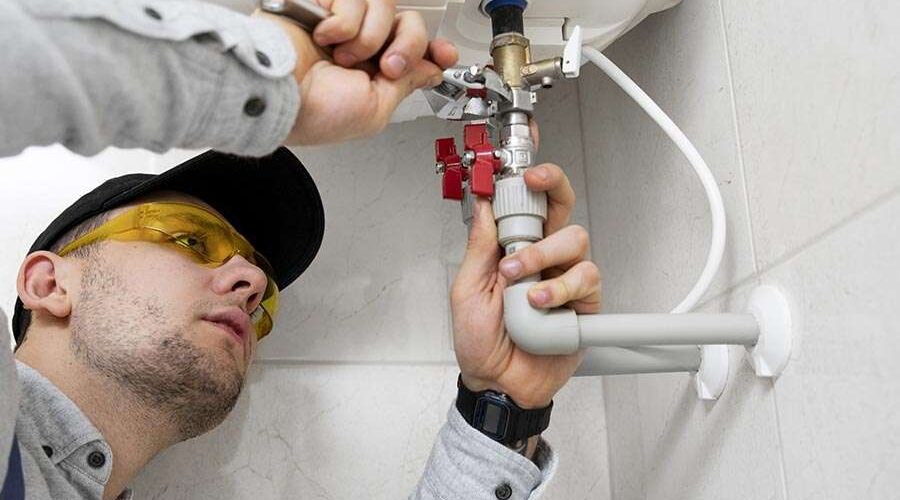
Water Heater Installation Maintenance After Replacement

Once your new unit is in place, regular upkeep matters. Basic maintenance can help extend the life of the system and keep performance steady. Flushing sediment, checking valves and inspecting key parts can all help prevent future issues.

For homeowners who want to better understand this process, see our guide on draining a heater.

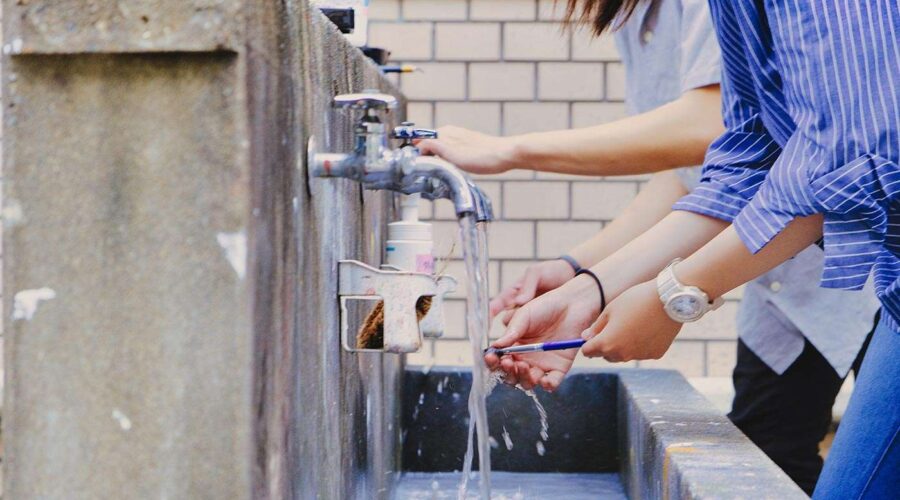
How Water on Demand and Smart Habits Can Lower Waste

Replacing an old unit is a good step, but daily habits matter too. Whether you choose a standard tank or a tankless water heater with water on demand, reducing unnecessary strain on your plumbing system can improve efficiency.

Simple changes can lower water usage and reduce waste across your home. For more practical ideas, our tips on saving water can help.

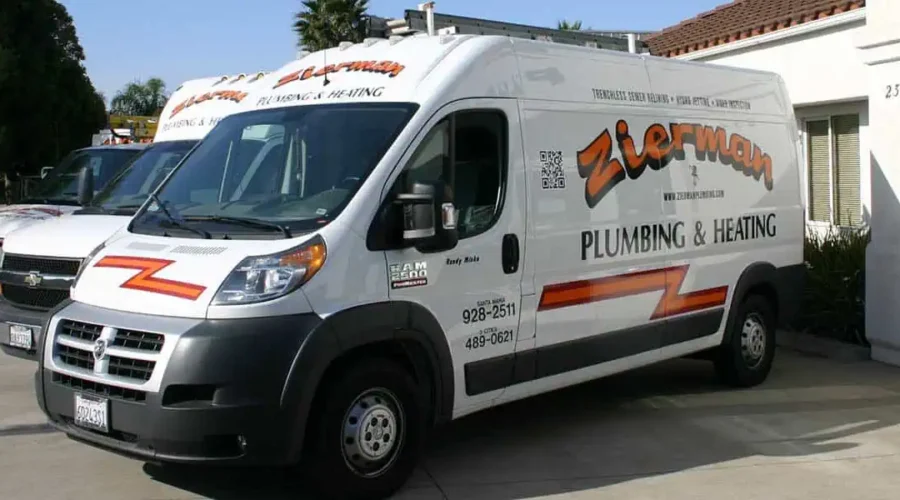
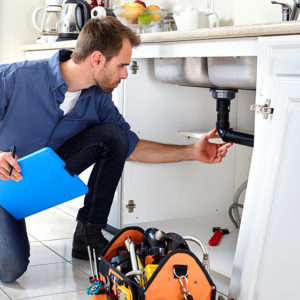
Ready for the Professionals?

If your current unit is failing or you’re ready to upgrade, Zierman Plumbing can help you choose the right solution for your home. From straightforward water heater replacement to guidance on tankless options, our team delivers honest recommendations, quality workmanship and dependable service backed by decades of local experience.

Contact Zierman Plumbing to schedule your appointment today!

Woman's hand tests water from a bathtub faucet
20Apr

Finding Your Reason For Hard Water

If you have cloudy dishes, soap scum, dry skin or white buildup on faucets, there’s usually a clear reason for hard water in your home.

In most cases, hard water comes from dissolved calcium and magnesium in the local water supply. As water moves through mineral-rich rock, it picks up minerals before it reaches your plumbing system. That mineral content affects water quality and changes how water behaves throughout your home.

It usually isn’t a health risk, but it can create frustrating problems with cleaning, appliances and plumbing performance.

What Is the Main Reason for Hard Water?

Mineral content.

Hard water forms when groundwater or municipal water passes through rock and collects minerals, especially calcium and magnesium. In many areas, that means the water entering your home already contains a high mineral load before it reaches your fixtures, pipes and appliances.

Some regions have naturally harder water because of the minerals in the ground and the way local water supplies are sourced and treated.

Hard Water and Soft Water Explained

Hard water contains higher levels of dissolved minerals, mainly calcium and magnesium. These minerals leave residue behind. Over time, they can create scale on faucets, showerheads, pipes and appliances.

Soft water contains far fewer of those minerals. It lathers better with soap, leaves less residue and is generally easier on plumbing fixtures and household appliances.

  • Hard water leaves mineral deposits and creates more soap scum.
  • Soft water rinses cleaner and helps soap work more effectively.

If your sinks, tubs and shower doors always seem to have a film on them, hard water may be the reason.

Signs You May Have Hard Water

  • White or chalky buildup on faucets
  • Spots on glasses and dishes
  • Reduced soap lather
  • Stiff laundry
  • Dry skin or dull hair
  • Scale around showerheads
  • Reduced performance from water heaters

How Hard Water Affects Plumbing and Appliances

Mineral buildup can collect inside pipes and other appliances that heat water. Over time, that buildup can restrict water flow and force equipment to work harder than it should. That’s especially true for water heaters, which are highly vulnerable to scale.

If sediment and mineral deposits collect in the tank, your unit may lose efficiency. It may take longer to heat drinking water and hot water for daily use. In some cases, buildup can shorten the life of the unit.

That’s one reason many homeowners look for ways to extend the life of their water heater. When hard water is present, regular maintenance becomes even more important.

Why Hard Water Makes Cleaning Harder

Soap doesn’t work as well in hard water. Instead of rinsing clean, it reacts with minerals and leaves behind residue. That’s where soap scum comes from.

This can affect:

  • Sinks
  • Showers
  • Bathtubs
  • Glassware
  • Clothing
  • Skin and hair

The more mineral-heavy the water is, the harder it becomes to keep surfaces clean. You may end up using more soap, more detergent and more time scrubbing.

Can Water Softening Help?

Yes. Water softening can reduce mineral content and help protect your plumbing system.

A water softener removes the minerals that cause hardness, which can improve cleaning, reduce scale and help appliances run more efficiently. Homeowners often notice softer laundry, cleaner dishes and less residue on fixtures once treatment is installed.

If hard water is affecting daily comfort or causing repeated plumbing issues, water softening may be worth considering.

Water Heater Maintenance Matters

When hard water is present, regular flushing can help remove some of its buildup. For homeowners who want to extend the life of a water heater, this simple maintenance step can make a real difference.

Draining an electric water heater should be done carefully, with power shut off first and the manufacturer’s instructions followed closely. If you’re unsure, it’s best to have a licensed plumber handle it. A professional can inspect the unit, flush sediment safely and check for signs of damage caused by hard water.

How Calcium Carbonate Builds Up in Your Plumbing

Calcium carbonate is one of the main minerals behind hard water scale. When hard water is heated or left to dry on surfaces, calcium carbonate can separate from the water and stick to metal, glass and plumbing parts. That’s why you may see a white, chalky crust on faucets, showerheads and inside appliances.

Over time, this buildup can narrow pipe openings, reduce water flow and make water heaters work harder than they should. It can also leave spots on dishes and add to soap scum problems. Catching this buildup early can help protect plumbing and improve overall water quality.

When to Call a Plumber

If you’re seeing buildup on fixtures, poor hot water performance or other signs, it may be time for a professional inspection.

A plumber can help determine whether hard water is affecting your home and recommend the right next step. That might include maintenance, fixture cleaning, water heater service or a long-term treatment option.

Understanding the reason for hard water is the first step. Once you know what’s causing it, you can make better choices for your plumbing system.

At Zierman Plumbing & Heating, we believe homeowners deserve clear answers and honest solutions. If hard water is creating problems in your home, our team’s here to help you keep your system working the way it should.

Plumber checking pipes under kitchen sink.
26Mar

What Pipe Relining Means For Your Home

Pipe relining gives homeowners a smart way to fix underground plumbing without tearing up the yard, driveway or slab. When a sewer line starts failing, most people picture trenches, noise and days of disruption. That used to be the standard approach. Today, pipe relining offers a cleaner option that restores flow and helps extend the life of the existing line.

This process is often used when a sewer pipe has cracks, corrosion, root intrusion or worn sections as a result of neglect over time. In many homes, these issues build slowly. You may notice frequent drain backups, slow drains, foul odors or soggy areas outside. Those warning signs often point to trouble below the surface. The problem won’t usually fix itself, and delays can lead to bigger damage.

Pipe relining is a trenchless repair method that creates a new pipe inside the old one. After the line is inspected and cleaned, a flexible liner coated with resin is inserted into the damaged section. That liner is then expanded and cured in place. Once it hardens, it forms a strong inner wall that seals cracks and restores the line. In many cases, the result is a smooth, durable surface that improves flow and reduces the chance of future blockages.

For homeowners, one of the biggest benefits is less disruption. Traditional excavation can mean digging through landscaping, concrete or hardscaping just to reach the broken line. That adds labor, cleanup and repair costs after the plumbing work is done. With pipe lining, access is often gained through existing entry points, which helps keep the property more intact. That matters when you want the problem fixed without turning your yard into a construction zone.

Pipe Lining for Damaged Pipes

This option also works well for many kinds of damaged pipes. Older sewer lines made from clay, cast iron or Orangeburg material can break down over time. Tree roots can force their way into small openings and expand the damage. Soil movement can also shift the line and create weak spots. In the right conditions, relining can address those failures without full replacement. It won’t be the answer for every situation, but it can be an excellent solution when the pipe still has enough structure to support the liner.

A camera inspection is the first step in deciding whether relining makes sense. The inspection shows where the damage is, how severe it is and whether the line is a good candidate. If the pipe has collapsed or has major sections missing, full replacement may still be necessary. But when the issue involves cracks, leaks or root intrusion, relining can often deliver lasting pipe repair with far less mess.

Homeowners sometimes ask whether relining is just a temporary patch. It isn’t meant to be a shortcut. When installed correctly, it creates a solid interior barrier that resists corrosion and helps prevent leaks. Because the new lining covers joints and small gaps, it can also make it harder for roots to re-enter the line. That added protection is one reason many property owners see it as a long-term investment instead of a quick fix.

Another reason people choose this approach is speed. Excavation projects can stretch on when crews need to cut concrete, remove soil and rebuild surfaces afterward. Relining is often completed faster, which reduces downtime and helps households get back to normal sooner. That can be especially important when the main sewer line is involved and the home’s plumbing use is limited during repairs.

Costs Over Time

While every job is different, the total cost of relining can be competitive because it may reduce restoration work after the plumbing repair is finished. Digging up a line is only part of the expense. Replacing landscaping, walkways or driveway sections can push the final bill much higher. A trenchless option may help avoid many of those added costs, which is why homeowners often look into it before committing to excavation.

If recurring drain issues keep coming back, it may be time to look deeper into the cause. Hidden sewer line problems often continue until the source of the damage is fixed. Pipe relining gives homeowners a practical way to restore service, protect the property and avoid major excavation. When conditions are right, it’s an efficient repair method for a failing sewer pipe, a reliable answer for damaged pipes and a modern form of pipe repair that keeps disruption to a minimum. With professional inspection and proper installation, pipe lining can turn a stressful plumbing problem into a much more manageable one.

Zierman Pipe Relining Services

At Zierman Plumbing, we inspect sewer lines carefully, explain your options clearly and recommend the right fix for your home. If pipe relining is the best solution, we use proven methods to restore your line with less disruption and lasting results. Zierman Plumbing is here to help with honest guidance, professional pipe repair and dependable service for damaged pipes and every sewer pipe issue that affects your home.

11Mar

How to Drain an Electric Water Heater

Draining an electric water heater is a common maintenance task that removes sediment from the tank. Sediment forms when minerals settle at the bottom of the heater. Over time, this buildup can reduce heating efficiency and shorten the system’s lifespan.

To drain an electric water heater, first turn off power at the circuit breaker. Then shut off the cold water supply valve on top of the tank. Attach a garden hose to the drain valve at the bottom of the heater and run the hose to a floor drain or outside. Open a hot water faucet somewhere in the house to allow air into the plumbing system. Finally, open the drain valve and allow the tank to empty. The process usually takes 30–45 minutes.

This maintenance removes sediment that collects inside the tank. Sediment can cause rumbling noises, lower efficiency and increase energy costs. Research shows buildup can reduce water heater efficiency by 10–15 percent.

However, draining a water heater is not always a safe DIY project. Electric water heaters contain pressurized hot water and heating elements. If power is not turned off correctly, the heating elements can burn out. Improper draining can also damage the drain valve or leave sediment trapped in the tank.

For those reasons, many homeowners choose to have a professional plumber perform water heater maintenance.

Below, we explain the basic draining process. Then we show why professional service is often the safer option.

Why You Should Drain an Electric Water Heater

Over time, minerals from water settle at the bottom of the tank. This sediment layer forms inside the water heater.

Sediment buildup can cause several problems:

  • Reduced heating efficiency
  • Popping or rumbling noises inside the tank
  • Damage to heating elements
  • Increased energy bills
  • Shorter water heater lifespan

Flushing or draining the tank removes this buildup. It helps the heating elements operate efficiently and keeps the system running longer.

Most manufacturers recommend draining a tank once per year as routine maintenance.

Preparation: What to Do Before Draining Your Water Heater

Before draining an electric water heater, proper preparation is essential for safety.

Start with these steps.

Turn Off the Power

Locate the circuit breaker that controls the water heater. Turn it off completely. This step prevents the heating elements from operating while the tank is empty.

Running heating elements without water can destroy them.

Shut Off the Cold Water Supply

Next, locate the cold water inlet valve at the top of the heater. Turn the valve clockwise to stop water entering the tank.

Allow the Water to Cool

If the heater recently ran, the water inside may be very hot. Allow time for the tank to cool before draining it.

This reduces the risk of burns.

Gather the Necessary Tools

Most water heater draining jobs require only a few basic tools.

Common tools include:

  • Garden hose
  • Bucket
  • Flathead screwdriver
  • Floor drain access

Step-by-Step: How to Drain an Electric Water Heater

Once preparation is complete, you can begin draining the tank.

Step 1: Turn Off the Circuit Breaker

Always start by shutting off power to the heater. This prevents damage to the heating elements.

Step 2: Shut Off the Cold Water Supply

Turn the cold water inlet valve to stop additional water entering the tank.

Step 3: Attach a Garden Hose to the Drain Valve

The drain valve is located near the bottom of the water heater tank. Attach a hose to direct water safely away.

Run the hose to a floor drain or outside.

Step 4: Open a Hot Water Faucet

Open a hot water faucet somewhere in the home. This allows air into the plumbing system and prevents a vacuum.

Water will drain faster when air enters the system.

Step 5: Open the Drain Valve

Use the valve handle or a screwdriver to open the drain valve. Water will begin flowing through the hose.

Step 6: Allow the Tank to Empty

Let the tank drain completely. This process usually takes 30–45 minutes depending on tank size.

Step 7: Flush Remaining Sediment (Optional)

If heavy sediment remains, briefly turn the cold water supply on. This helps stir up debris so it flushes out.

Step 8: Refill the Tank

Close the drain valve and remove the hose. Turn the cold water supply back on.

Leave a hot water faucet open until water flows smoothly. This removes air from the system.

Step 9: Restore Power

Once the tank is completely full, restore power at the breaker.

Never turn the power back on while the tank is empty.

How Long Does It Take to Drain a Water Heater?

Draining a water heater typically takes 30 to 45 minutes.

However, several factors can affect draining time:

  • Tank size
  • Sediment buildup
  • Water pressure
  • Drain valve condition

Older water heaters with heavy sediment may drain more slowly.

DIY vs Professional Water Heater Draining

Many homeowners attempt to drain their water heater themselves. While this is possible, it can also create problems.

FactorDIY DrainProfessional Service
SafetyRisk of burns or electrical damageSafe procedures and tools
Sediment RemovalOften incompleteFull tank flush removes buildup
InspectionUsually skippedPlumber checks valves and heating elements
Risk of DamagePossible drain valve failureReduced risk of costly mistakes
Long-Term EfficiencyLimited improvementOptimized heater performance

Professional plumbers often perform a full water heater flush, not just a simple drain.

During maintenance, technicians may also inspect:

  • Heating elements
  • Temperature and pressure relief valve
  • Water supply connections
  • Signs of corrosion or leaks

This helps prevent expensive water heater failures.

Common Problems When Draining a Water Heater

Some homeowners encounter issues during the draining process.

Common problems include:

Clogged Drain Valve

Sediment can block the drain valve. When this happens, water may not flow properly.

Water Heater Won’t Drain

Air may not be entering the system. Opening a hot water faucet usually fixes this.

Sediment Blocking the Tank

Heavy sediment buildup can slow draining. A professional flush may be required.

Tank Not Refilling Properly

Air trapped in plumbing lines can prevent proper refilling.

How Often Should You Drain a Water Heater?

Most experts recommend draining a tank once per year.

Homes with hard water may need flushing every six months.

Regular maintenance helps:

Signs Your Water Heater Needs Flushing

Your water heater may need maintenance if you notice these warning signs:

  • Rumbling or popping noises from the tank
  • Cloudy or dirty hot water
  • Reduced hot water supply
  • Rising energy bills
  • Inconsistent water temperature

These symptoms often indicate sediment buildup inside the tank.

When to Call a Professional Plumber

While some homeowners attempt DIY maintenance, many situations require professional help.

Consider calling a plumber if:

  • The drain valve is clogged
  • Sediment buildup is severe
  • The water heater is older than 8–10 years
  • You notice leaks or corrosion
  • The heater stops producing hot water

Professional maintenance ensures the tank is fully flushed and inspected for damage.

Regular service can help prevent costly water heater replacement.

Need Help With Your Water Heater?

Draining a water heater sounds simple, but sediment buildup, stuck drain valves and electrical safety issues can turn it into a bigger problem.

At Zierman Plumbing & Heating, our technicians perform a complete water heater flush and inspection. We remove sediment, check safety valves and make sure your system runs efficiently.

With 75+ years serving Santa Maria homeowners, you can trust our team to get the job done right.

Call Zierman Plumbing today to schedule water heater maintenance and keep your hot water running reliably.

Woman's hand tests water from a bathtub faucet
17Nov

Essential Plumbing Maintenance Tips for Santa Maria Homeowners

When it comes to keeping your home running smoothly, plumbing maintenance should be high on your list. For Santa Maria homeowners, staying ahead of small issues with regular maintenance and smart habits can prevent water damage and reduce the risk of costly repairs. Here are essential maintenance tips every homeowner in the Central Coast should know.

1. Inspect for Leaks Regularly

Leaks often go unnoticed until they become major problems. Check under sinks, around toilets, and near your water heaters for signs of dripping or pooling. A small leak can waste hundreds of gallons of water over time and lead to mold or structural damage.

Quick Tip: Use a flashlight to check under cabinets, crawl spaces, and around shutoff valves. If you spot moisture or rust, it’s time to act.

Explore our Residential Plumbing Services

2. Clean Your Drains Carefully

Grease, hair, soap scum, and food particles can all clog your drains. Avoid chemical cleaners, which can damage your pipes over time.

What to Do Instead:

  • Use mesh drain covers in sinks and tubs.
  • Flush drains monthly with hot water and baking soda.
  • For tough clogs or issues in your sewer line, try a drain snake or call a professional.

3. Flush Your Water Heater Annually

Mineral and sediment buildup inside your water heater reduces efficiency and shortens its lifespan. Flush your water heater once a year to remove sediment and help it run better.

Bonus Tip: Check the area around your water heater for signs of corrosion or small leaks. Early detection can save you a costly repair and reduce your water bill.

Need help with your water heater?

4. Monitor Your Water Pressure

High water pressure might feel great in the shower, but it can stress your pipes. Use a pressure gauge to check your system.

Ideal Water Pressure Range: 40–60 PSI. Anything higher could cause leaks or bursts. A pressure-reducing valve can help regulate it and protect your home’s plumbing system.

5. Know Where Your Shutoff Valve Is

In case of a major leak or burst pipe, shutting off your home’s water supply quickly can prevent thousands of dollars in water damage.

How to find your shutoff valve: Usually near the sump pump, water meter, or where the main line enters your home. Make sure every adult in your house knows how to shut off the water.

6. Insulate Exposed Pipes

Even in Santa Maria’s mild climate, a cold snap can cause outdoor or exposed pipes to freeze. Use foam pipe insulation to protect them.

For Extra Coverage: Pay attention to garages, crawl spaces, and exterior walls, especially if you live closer to the coast or in higher elevations like Orcutt.

7. Mind What You Flush

Toilets aren’t trash cans. Only flush human waste and toilet paper. Feminine products, wipes (even “flushable” ones), and paper towels can clog pipes fast.

Rule of Thumb: If it doesn’t break down in water, don’t flush it.

8. Maintain Your Garbage Disposal

Garbage disposals aren’t designed to handle grease, fibrous veggies (like celery or corn husks), bones, or large food scraps.

Best Practices:

  • Run cold water while using it.
  • Avoid stringy or starchy foods.
  • Clean it monthly with ice cubes and a citrus peel.

9. Check Your Shower Heads and Faucets

Mineral buildup from hard water can clog showerheads and aerators. This restricts flow and increases pressure on your fixtures.

Simple Shower Head and Faucet Fix: Soak them in vinegar overnight to dissolve mineral deposits and improve flow. This can also help lower your water bill.

10. Schedule Annual Plumbing Maintenance

Even the most diligent DIYer can miss hidden issues. A regular check from a licensed plumber helps catch small problems before they become big ones.

Peace of Mind: Professional plumbing maintenance includes leak detection, pipe assessments, and water heater inspections. It can prevent costly repairs and protect your entire home’s plumbing system.

Keep Plumbing Problems Out of Sight and Out of Mind

Taking a proactive approach to plumbing maintenance is one of the smartest things you can do for your home. Whether it’s preventing a leak or protecting your pipes from wear, these simple maintenance tips can help you avoid expensive repairs.Need help with something specific? Contact Zierman Plumbing today to schedule a residential plumbing check-up.

2Aug

3 Summertime Plumbing Issues Most Santa Maria Residents Deal With

It is paramount to minimize major plumbing issues by scheduling routine inspections and maintenance.

Continue Reading
Plumber checking pipes under kitchen sink.
19Feb

Tips on Choosing the Right Plumber

Are you facing plumbing issues at home and unsure how to choose the right plumber? Selecting a reliable plumbing company can be daunting, but it doesn’t have to be! From confirming valid licenses and insurance to ensuring transparent pricing and quality customer service, our comprehensive guide offers essential tips to help you make an informed decision. Discover how to avoid costly mistakes and find a professional plumber who guarantees high-quality work. Don’t let minor plumbing problems escalate—read on to learn how to secure the best plumbing services for your home!

Continue Reading
1Apr

Heat Pump vs. Furnace: Which is Better For Your Home?

If you’re looking for the best heating unit to keep your home warm, there are several options to consider. One of the classic options is a furnace, which uses a natural gas flame to heat air and then spread that hot air around your home. If you want to go super “old school,” there’s also always a wood-burning stove or a good old fashioned fireplace.

Continue Reading
how to save water
14Dec

Tips on How to Conserve Water

Here at Zierman Plumbing, we fully understand the importance of finding ways to conserve water, and we’ve come up with a short list of things you can do to help, especially as the warmer months approach and the demand for water consumption increases. Not only will these recommendations help to ease the burden in our drought-stricken state, they’ll also help to reduce your water costs.

Continue Reading
Zierman Plumbers van
31Oct

How to Find the Right Plumber

Every homeowner needs a plumber that they can trust, but finding one isn’t always an easy task. First time and veteran homeowners alike often struggle to find the right person for the job. Whether it’s finding a plumber near you, determining if they have the proper qualifications or understanding the risks of using an unlicensed plumber, learn from the professionals!

Continue Reading
Scroll to top