
Latest Plumbing & Heating News

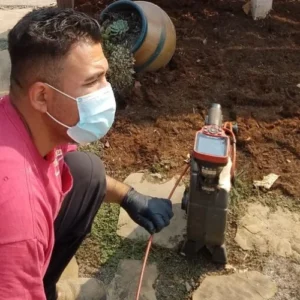
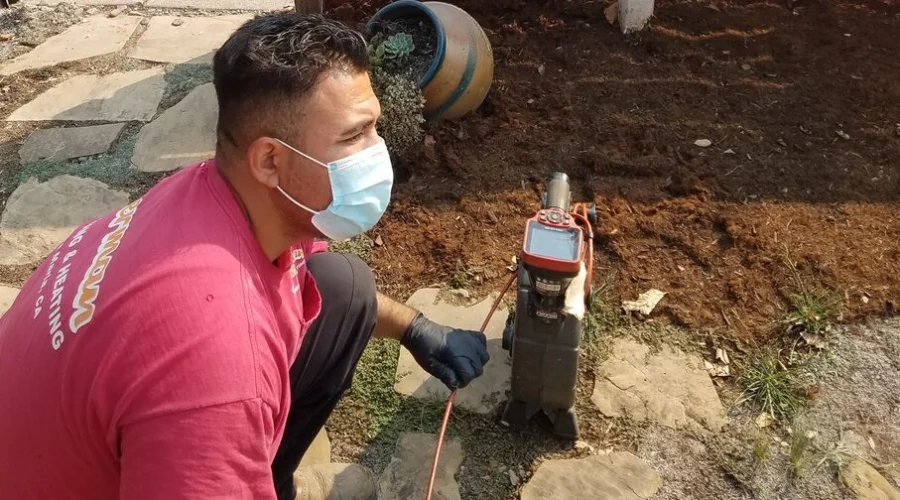
Zierman Plumbing technician running a sewer camera inspection
29Oct

Sewer Line Inspection in Santa Maria Before Rainy Season

The rainy season can reveal hidden sewer line problems. For Santa Maria homeowners, October is a good time to check for warning signs.

A damaged sewer pipe may seem fine during dry weather. But cracks, tree roots and blockages can create problems when groundwater rises.

A sewer line inspection in Santa Maria can help find these issues early. You can plan repairs before a small problem becomes a messy backup.

Here’s what to check before the Central Coast rainy season begins.

Why Check Your Sewer Line Before the Rainy Season?

Santa Maria typically gets most of its rain from November through March. October offers a useful window to prepare.

Rainwater should flow through storm drains, not your home’s sewer line. These are separate systems.

However, rain can expose existing sewer pipe damage.

Groundwater may enter cracked pipes or loose joints. This extra water can make an existing blockage worse. Tree roots may also enter damaged sections and restrict wastewater flow.

A healthy sewer line should carry wastewater away without trouble.

A professional inspection helps confirm whether your pipes are working as they should.

7 Signs You May Need a Sewer Line Inspection in Santa Maria

Sewer problems often start with small changes around the house. Watch for these seven warning signs.

1. Several Drains Are Running Slowly

One slow sink may have a simple clog. Several slow drains can point to a deeper problem.

Pay attention when toilets, tubs and sinks all drain slowly. The blockage may be in your main sewer line.

Professional drain cleaning services can help remove stubborn blockages and restore proper flow.

2. You Hear Gurgling From Drains or Toilets

A toilet should not gurgle when you run the shower.

Gurgling can happen when air becomes trapped behind a blockage. It may also signal a plumbing vent problem.

If the sound keeps returning, have a plumber find the cause.

3. Sewer Odors Keep Coming Back

A sewer smell inside or outside your home needs attention.

The source could be a dry drain trap, damaged seal or sewer pipe issue.

Persistent odors deserve a professional check. Do not assume the smell will disappear on its own.

4. Water Backs Up Into a Tub or Shower

A backup is one of the clearest signs of trouble.

You might flush a toilet and see water rise in a shower. Your washing machine may also cause a nearby drain to overflow.

These problems can point to a blocked main sewer line.

Stop using water if sewage starts backing up. Contact Zierman’s emergency plumbing team before the problem spreads.

5. Your Yard Has Unexplained Wet Spots

A soggy patch may have several causes. Irrigation leaks and poor drainage are common examples.

But a damaged underground pipe can also leave wet soil. You may notice odors or unusually green grass nearby.

Zierman’s leak detection and repair services can help investigate suspected water leaks. Sewer line concerns may require a separate camera inspection.

6. The Same Drain Keeps Clogging

A drain that clogs once may only need cleaning.

Repeated clogs suggest something has not been fully resolved. Grease buildup, pipe damage or tree roots may be involved.

Clearing a blockage may restore flow without fixing the underlying problem.

7. Large Trees Grow Near Your Sewer Line

Tree roots seek moisture through the soil.

When they reach cracks or loose pipe joints, they may enter the sewer line. Over time, roots can trap waste and slow drainage.

Mature trees are common in established Central Coast neighborhoods. Their roots are worth considering when sewer problems keep returning.

What Should Santa Maria Homeowners Check Before the Rainy Season?

You do not need special equipment to spot early warning signs.

Start with a few simple checks around your home.

Check Drains Throughout the House

Run water in your kitchen and bathroom sinks. Watch how quickly each drain clears.

Then check the shower, bathtub and toilets.

Look for slow drainage, unusual sounds or water rising elsewhere. These symptoms may point to shared plumbing problems.

Walk Around Your Yard

Look for wet areas that do not match your watering schedule.

Notice unusual odors, sunken soil or patches of fast-growing grass.

Also check whether large trees stand near the sewer line’s likely path.

These signs do not prove a sewer leak. They help a plumber know where to investigate.

Locate Your Sewer Cleanout

A sewer cleanout gives plumbers access to your drain system.

It often looks like a capped pipe near the house or yard. Its location varies by property.

Knowing where it is can save time during a service visit.

Do not remove the cap if you suspect a backup. Sewage may be under pressure.

Review Your Home’s Plumbing History

Think about problems from past rainy seasons.

Have you dealt with recurring clogs? Has a plumber removed roots before? Do you know the age of your sewer pipe?

Share this history when scheduling an inspection. It helps the plumber focus on likely trouble spots.

For more prevention ideas, read our plumbing maintenance tips for Santa Maria homeowners.

How Does a Professional Sewer Line Inspection Work?

A professional sewer camera inspection lets a plumber see inside the pipe.

The plumber usually starts by finding a suitable access point. This may be an existing sewer cleanout.

Next, a small waterproof camera moves through the sewer line.

The video can reveal several problems:

  • Tree roots growing into the pipe
  • Cracks, broken sections or separated joints
  • Heavy buildup and recurring blockages
  • Low spots where water collects
  • Signs of pipe corrosion or deterioration

The plumber can then explain what the footage shows.

A camera inspection does not automatically mean you need major repairs. Some problems only require cleaning. Others may need a more lasting solution.

Zierman has used video inspection technology to help diagnose hidden pipe problems. Learn more in our article, We Can See Inside Your Pipes.

The goal is to understand the pipe’s condition before choosing a repair.

Common Sewer Line Problems in Older Santa Maria Homes

Older homes can have sewer pipes made from materials that age differently.

Some properties have clay, cast iron or other older pipe materials. Newer sections may use plastic piping.

The pipe’s condition matters more than its age alone.

Tree Root Intrusion

Roots can enter through cracks and loose joints.

Once inside, they may catch debris and create recurring clogs. Cutting roots can restore flow, but damaged joints may still need repair.

Cracked or Offset Pipes

Soil movement, age and outside pressure can affect buried pipes.

A cracked pipe may allow groundwater to enter. An offset joint can catch waste and restrict flow.

Corrosion and Pipe Deterioration

Some older metal pipes can corrode over time.

Rough interior surfaces may catch debris. Severe deterioration can weaken the pipe itself.

Pipe Bellies

A pipe belly is a low section where water collects.

Wastewater should flow downhill toward the public sewer. When a section sags, solids may settle and create repeated clogs.

A camera inspection can help identify these conditions.

Does Rain Cause Sewer Backups?

Rain does not normally enter a properly working household sewer line.

Santa Maria’s storm drainage and sanitary sewer systems serve different purposes.

However, heavy rain may expose existing defects.

Groundwater can seep through cracked pipes or damaged joints. Extra water may also enter the broader sewer system through defects or improper connections.

If your drains back up during storms, do not assume rain is the only cause.

A plumber can check whether your private sewer line has a blockage or structural problem.

When Does a Sewer Line Need Cleaning or Repair?

Not every sewer problem requires replacing a pipe.

The right solution depends on what the inspection finds.

Sewer cleaning may help when grease, debris or roots restrict flow. It can restore drainage when the pipe remains structurally sound.

Spot repairs may be appropriate when damage affects one accessible section.

Sewer pipe relining may be an option for certain damaged pipes. This method creates a new lining inside the existing pipe. The pipe must first meet the requirements for that repair method.

Learn more about Zierman’s sewer pipe relining services.

Severely collapsed or misaligned pipes may need excavation and replacement.

A plumber should explain the findings and available options before work begins.

How Much Does a Sewer Line Inspection Cost in Santa Maria?

The cost of a sewer line inspection varies by property.

Several factors can affect the price. These include access to the pipe, line length and inspection complexity.

A camera inspection may be more straightforward when an accessible cleanout is available.

Extra work may be needed if the line is blocked or access is difficult.

Ask what the quoted service includes. Find out whether you will receive an explanation of the findings and repair recommendations.

At Zierman Plumbing, we believe homeowners should understand their options before approving work.

When Should You Schedule a Sewer Line Inspection?

October is a practical time to prepare for the Central Coast rainy season.

You may want to schedule an inspection before major storms if:

  • Your home has recurring drain problems
  • You’ve had tree roots removed from the sewer line
  • Your property has older sewer piping
  • Sewage backed up during a previous storm
  • You’re buying an older home and want to check the sewer line

You do not need to wait for October if you notice warning signs.

If sewage is already backing up, seek plumbing help right away.

Frequently Asked Questions About Sewer Line Inspections

Is a sewer line inspection necessary every year?

Not every home needs an annual camera inspection.

The right schedule depends on pipe age, condition and past problems. Homes with recurring clogs or root intrusion may need closer monitoring.

Ask a plumber what makes sense for your property.

Can tree roots damage a sewer line?

Yes. Roots can enter existing cracks and loose joints.

As they grow, they can trap debris and restrict wastewater flow. A camera inspection can help confirm whether roots are present.

Can I inspect my sewer line myself?

You can check for warning signs around your home.

However, viewing the inside of a buried sewer pipe requires specialized equipment. A professional camera inspection provides a clearer picture of its condition.

Will a sewer camera inspection clear a clog?

No. The camera helps identify the problem.

Cleaning equipment may be needed to remove a blockage. Your plumber can recommend the next step after assessing the line.

Should I get a sewer inspection before buying an older home?

It can be a smart step, especially when the pipe’s history is unknown.

A standard home inspection may not include a camera inspection of the sewer lateral. Checking the line can help you understand its condition before closing.

Who Is Responsible for the Sewer Line Outside My House?

Homeowners are often responsible for maintaining their private sewer lateral.

The exact responsibility can depend on local rules and the property’s connection. Check with the appropriate local sewer agency if you’re unsure.

Schedule a Sewer Line Inspection in Santa Maria, CA

Sewer problems rarely arrive at a convenient time.

If you’ve noticed slow drains, recurring clogs or sewer odors, now is a good time to investigate.

Zierman Plumbing has served Santa Maria and nearby Central Coast communities since 1950. Our team helps homeowners identify plumbing problems and understand their repair options.

Call 805-928-2511 to discuss your sewer concerns and schedule service.

Zierman Plumbing. Book And Consider it Done.
16Oct

Seasonal Plumbing Maintenance Checklist for Central Coast Homeowners

Your plumbing system works hard throughout the year. From summer water use to cooler winter mornings, seasonal changes affect your home’s pipes. Regular plumbing maintenance helps prevent leaks, clogs and unexpected repairs.

Even Santa Maria’s mild climate can bring seasonal plumbing challenges. At Zierman Plumbing & Heating, we believe prevention is always worth the effort. Use this seasonal plumbing checklist to protect your home throughout the year.

Why Seasonal Plumbing Maintenance Matters

Small plumbing problems can become expensive when ignored. A slow leak may damage cabinets, walls or flooring. A clogged drain can eventually cause water to back up.

Seasonal inspections help you catch warning signs early. They also provide opportunities to improve water efficiency. For Central Coast homeowners, routine maintenance makes sense year-round.

Spring Plumbing Checklist

Spring is a great time to inspect plumbing after cooler winter weather. Start by checking faucets, fixtures and exposed pipes.

Check for Hidden Water Leaks

Look beneath kitchen and bathroom sinks. Check cabinets for moisture, stains or musty smells. Inspect the areas surrounding toilets and washing machines.

Even small drips can waste water and cause damage. If you notice persistent moisture, schedule professional leak detection.

Inspect Outdoor Faucets

Outdoor plumbing can experience wear throughout the year. Turn on each outdoor faucet and check for leaks. Look for dripping connections or damaged hose fittings. Make sure water flows normally when the faucet is open.

Check Your Water Heater

Look around the water heater for moisture or corrosion. Listen for unusual popping or rumbling noises. Pay attention to changes in hot water temperature.

A professional inspection can identify issues before equipment fails. Catching problems early may help prevent unexpected hot water interruptions.

Summer Plumbing Checklist

Summer often brings increased outdoor water use. Gardening, outdoor cleaning and extra laundry can place additional demand on plumbing.

Inspect Irrigation Systems

Check sprinkler heads for broken components or leaks. Look for unusually wet spots in your yard. Inspect exposed irrigation pipes and connections.

A damaged sprinkler system can waste significant amounts of water. Regular inspections help you identify problems before they affect your water bill.

Watch for Rising Water Bills

Compare your water bills with previous months. A sudden increase may indicate an undetected leak.

Check whether your household’s water use has changed. If nothing explains the increase, consider professional leak detection.

Check Household Drains

Kitchen and bathroom drains should empty without difficulty. Slow drainage may indicate developing blockages.

Avoid pouring grease or cooking oil down your kitchen sink. Keep hair and debris out of bathroom drains. If several fixtures drain slowly, contact a plumber for an inspection.

Regular cleaning can help reduce recurring clogs. When blockages persist, Zierman’s professional drain cleaning services can help restore proper drainage.

Fall Plumbing Checklist

Fall is the ideal time to prepare for cooler temperatures. Santa Maria rarely experiences severe winter conditions, but cold spells still occur. A little preparation now can help prevent unexpected repairs.

Inspect Exposed Pipes

Check plumbing in garages, crawl spaces and outdoor areas. Look for damaged insulation or exposed piping. Unprotected pipes can be vulnerable during occasional freezing temperatures.

Professional pipe insulation can help reduce that risk and protect vulnerable water lines. It’s a simple way to prepare your plumbing for colder weather.

Inspect Your Water Heater

Cooler weather often makes hot water problems more noticeable. Check whether your water heater provides consistent temperatures. Watch for leaks, unusual sounds or signs of corrosion.

If your unit is aging, consider a professional assessment. A plumber can help determine whether maintenance, repair or replacement makes sense.

Locate Your Main Water Shutoff Valve

Every homeowner should know how to shut off the water supply. Find your home’s main water shutoff valve. Make sure household members know its location.

This can help limit damage during a plumbing emergency. If a valve is stuck or damaged, have a plumber inspect it.

Winter Plumbing Checklist

Although Central Coast winters are generally mild, cooler weather still deserves attention. Protect vulnerable outdoor plumbing and monitor your home’s heating systems.

Protect Outdoor Water Lines

Disconnect garden hoses before expected freezing weather. Check exposed pipes for cracks or damage. Consider insulation for vulnerable plumbing areas.

These steps help reduce the risk of cold-weather pipe problems. A little preparation can help protect your home when temperatures drop.

Watch for Changes in Water Pressure

Sudden pressure changes can indicate plumbing issues. Low pressure may result from leaks, blockages or supply problems.

Unexpectedly high pressure can also stress pipes and fixtures. A plumber can identify the cause and recommend repairs.

Inspect Your Heating System

Your home’s heating equipment also needs seasonal attention. Schedule furnace maintenance before colder weather arrives.

A professional inspection helps identify problems before you need dependable heat. Routine care can also support efficient heating system performance.

Don’t Forget Backflow Prevention

Backflow prevention is another important part of plumbing maintenance. Backflow occurs when water moves in the wrong direction through plumbing connections. This can allow contaminated water to enter a clean water supply.

Backflow prevention devices help reduce this risk. These devices are especially important for certain irrigation and commercial plumbing systems.

Some properties must complete periodic backflow testing under local water provider requirements. Inspection and testing help confirm these devices operate correctly.

Zierman Plumbing & Heating provides professional backflow certification, testing and repair. Our team has also added two new certified backflow technicians to support customers’ testing needs.

Property owners can learn more about our backflow testing and certification services to help keep their systems safe and compliant. Regular testing can help identify problems before they affect water quality.

When Should You Call a Professional Plumber?

Some seasonal checks are simple enough to complete yourself. However, certain problems require professional diagnosis and repair.

Contact a licensed plumber if you notice persistent leaks, sewer odors or recurring clogs. You should also seek help for water heater failures or sudden pressure changes.

Don’t ignore signs of water damage around walls or flooring. Early intervention can help reduce damage and repair costs.

Protect Your Plumbing With Zierman Plumbing & Heating

A little seasonal maintenance can help prevent costly plumbing problems. From leak detection to backflow testing, Zierman Plumbing & Heating helps keep Central Coast properties running smoothly.

Our experienced team provides dependable service for homeowners and businesses in Santa Maria and surrounding communities. We’re here to help you address plumbing concerns throughout the year.

Ready to get your plumbing checked? Contact Zierman Plumbing & Heating today to schedule service or request a quote.

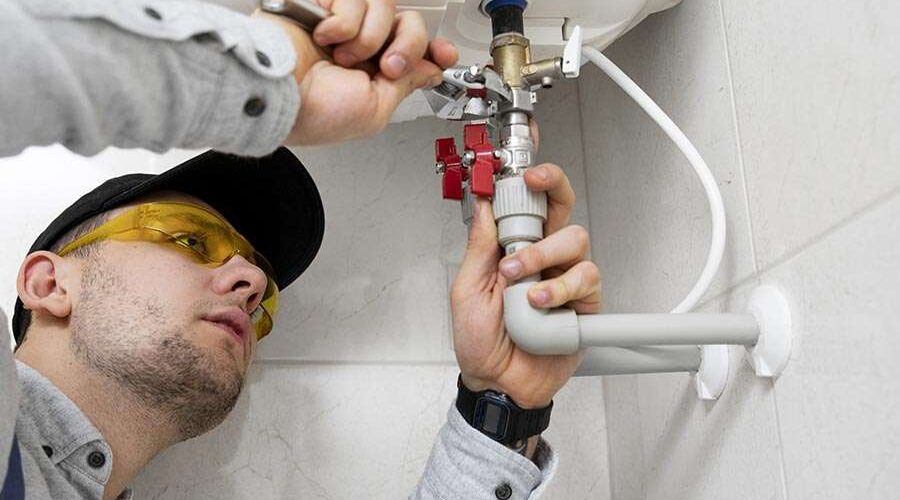
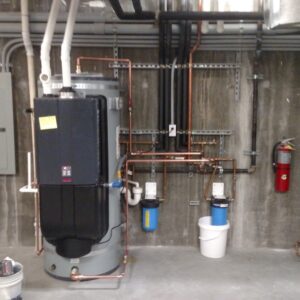
Water heater repair and replacement, large water heater repaired
21Sep

How Long Do Water Heaters Last? Signs It’s Time for a Replacement

Nobody wants to discover a broken water heater during their morning shower. Unfortunately, water heaters don’t last forever. Over time, their parts wear down and performance can decline.

Knowing your water heater’s expected lifespan helps you prepare for replacement. It can also prevent unexpected breakdowns and costly water damage.

At Zierman Plumbing & Heating, we help Central Coast homeowners maintain reliable hot water. Here’s how to recognize an aging water heater and what to do next.

What Is the Average Lifespan of a Water Heater?

Most traditional tank water heaters last around 8 to 12 years. Tankless water heaters often last 20 years or longer with proper maintenance.

However, these numbers are general estimates. Some systems fail early, while others remain dependable for longer.

Several factors influence how long your water heater lasts. These include water quality, maintenance habits, installation quality and daily demand. The type of equipment also makes a difference.

Traditional Tank Water Heaters

Traditional models store hot water in a large insulated tank. Over time, corrosion can damage the tank’s interior. Minerals may also collect at the bottom.

These problems can shorten the system’s useful life. Regular maintenance helps reduce wear and supports reliable performance.

Tankless Water Heaters

Tankless systems heat water when needed. Because they don’t store large amounts of water, they avoid traditional tank corrosion.

However, minerals can still collect inside the heat exchanger. Regular flushing or descaling helps protect system performance. Properly maintained tankless water heaters can provide many years of dependable service.

Five Signs Your Water Heater May Need Replacement

Your water heater often gives warning signs before it fails completely. Pay attention to these common problems.

1. Your Water Heater Is Over Ten Years Old

Age alone doesn’t mean immediate replacement is necessary. However, older water heaters deserve closer attention.

If your tank system is approaching ten years, consider scheduling an inspection. A plumber can check its condition and help you plan.

2. You’re Running Out of Hot Water

Does your shower suddenly turn cold? Are you waiting longer between showers?

These problems may indicate sediment buildup, faulty heating components or insufficient capacity. Sometimes, a simple repair solves the problem. Other times, replacing the water heater makes better financial sense.

3. You Notice Water Around the Tank

Water pooling beneath your water heater deserves immediate attention. A loose connection or faulty valve might be responsible.

However, a leaking tank usually requires replacement. Ignoring the problem can lead to extensive water damage. If you discover active leaking, contact a licensed plumber promptly.

4. Your Water Heater Makes Strange Noises

Popping, banging or rumbling noises may indicate mineral buildup. Sediment collects inside the tank as water heats. This buildup can interfere with heating and reduce efficiency.

Not every unusual noise means replacement is necessary. A professional inspection can identify the cause.

5. Your Hot Water Looks Rusty

Discolored hot water may indicate corrosion inside the water heater. However, plumbing pipes and water supply conditions can also cause discoloration.

A plumber can help determine where the problem originates. If the tank is severely corroded, replacement may be necessary.

For more guidance, explore these signs your hot water tank needs replacement. This guide can help you recognize problems before your system fails.

What Factors Affect Water Heater Lifespan?

Water Quality

Mineral content can affect water heater performance. When minerals collect inside equipment, they can restrict flow and reduce heat transfer. Both tank and tankless models can experience mineral buildup.

Maintenance Habits

Regular maintenance helps identify developing problems. A professional may inspect connections, check safety components and assess mineral buildup.

Tank models may also need their anode rods inspected. The anode rod helps protect the tank against internal corrosion.

Installation Quality

Poor installation can shorten equipment life. Incorrect water pressure, improper venting or unsuitable connections may cause problems.

Professional installation helps the system operate safely and efficiently. It also helps prevent avoidable issues that could affect your water heater’s lifespan.

Household Hot Water Use

Larger households often place greater demands on water heaters. Frequent showers, laundry loads and dishwashing increase daily use.

Choosing the correct equipment size can help support long-term performance. A properly sized system also helps provide enough hot water for everyday activities.

Should You Repair or Replace Your Water Heater?

Not every water heater problem requires replacement. A faulty thermostat or heating element may be repairable. However, an aging system with repeated breakdowns deserves careful evaluation.

Consider replacement when:

  • The tank leaks or shows serious corrosion.
  • Repairs are becoming frequent and expensive.
  • Your water heater struggles to meet household demand.
  • The equipment is near or beyond its expected lifespan.

Compare repair costs against the price of a dependable replacement. An inspection helps you avoid replacing equipment unnecessarily.

Zierman Plumbing & Heating provides water heater repair and replacement services throughout Santa Maria and nearby communities. Our team can assess your system and explain your available options.

Can Maintenance Extend a Water Heater’s Life?

Routine maintenance can help protect your investment. Start by checking for visible leaks and changes in performance. Pay attention to unusual noises or fluctuating water temperatures.

Schedule professional maintenance based on your equipment manufacturer’s recommendations. A licensed plumber can inspect important safety components and identify developing problems.

Avoid opening gas connections or working on electrical components yourself. Water heaters combine hot water, pressure and potentially dangerous energy sources. Professional service is the safer choice.

Choosing Your Next Water Heater

If replacement makes sense, consider your household’s future needs. Traditional tank water heaters often have lower installation costs. Tankless models may provide longer service life and improved efficiency.

Your budget, plumbing layout and available space all influence the decision. Ask about equipment efficiency ratings and manufacturer warranty coverage.

Some models carry six-year warranties, while others offer ten-year protection. Coverage depends on the manufacturer and specific equipment.

Our team can explain your options without pressuring you into unnecessary upgrades. When you’re ready, our professional water heater installation services can help you upgrade to a dependable system.

Keep Your Hot Water Running With Zierman Plumbing & Heating

An aging water heater doesn’t have to become an unexpected emergency. Zierman Plumbing & Heating helps Santa Maria homeowners identify problems before they get worse.

Whether you need a minor repair or complete replacement, our team can help. We provide honest recommendations and dependable service to keep your home’s hot water running.

Concerned about your water heater’s age or performance? Contact Zierman Plumbing & Heating to schedule an inspection or request a quote for replacement.

14Sep

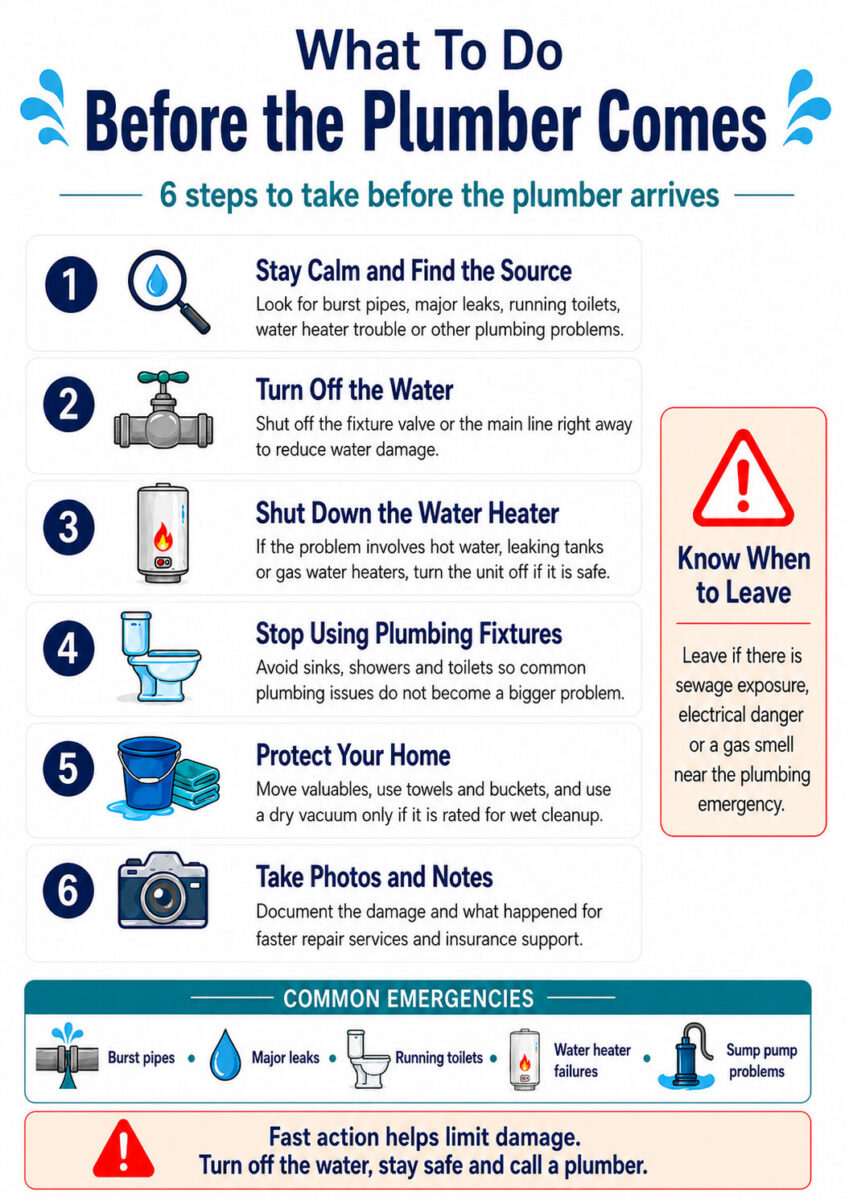
What To Do in a Plumbing Emergency (Before the Plumber Arrives)

1. Stay Calm and Find the Source of the Problem

First, take a breath. Most plumbing issues feel worse when water is spreading or fixtures are backing up. A calm look around can help you act faster.

Try to identify where the water is coming from. Common signs include:

  • Water pooling near sinks, toilets or appliances
  • Wet flooring near walls or cabinets
  • Water dripping from ceilings
  • No hot water from your water heater
  • Sewage odors near drains

Some common plumbing emergencies are obvious, like burst pipes or major leaks. Others may point to a bigger problem hidden inside your plumbing system.

Do not try to take apart pipes or fixtures during an active emergency. Your goal is to limit damage until professional plumbing help arrives.

2. Turn Off the Water Right Away

Next, turn off the water. This is often the most important step you can take.

For a single fixture, use the shutoff valve near the problem area. Toilets usually have a valve behind the base. Sinks often have valves under the cabinet. Appliances may have shutoffs nearby.

For larger emergencies, use the main water shutoff valve. This can stop water from feeding the whole house.

Turn the valve clockwise until it stops. Then open a nearby faucet to release pressure from the line.

If you are dealing with burst pipes, major leaks or fast-spreading water, do not wait. Shut off the main supply first. You can always restore water later once the problem is safe.

3. Shut Off the Water Heater if Needed

If your emergency involves your water heater, take extra care. Leaks from tank-style units can release a lot of water. They can also affect electrical or gas connections.

For electric water heaters, switch off the breaker. For gas water heaters, turn the gas control valve to the off position if you can reach it safely.

Do not touch standing water near electrical panels, outlets or appliances. Leave the area and wait for help.

If you have gas water heaters, leave the home and call for emergency help if you smell gas. Do not use lights, matches or electronics nearby.

Loss of hot water may not always be dangerous. But a leaking tank, strange noises or water around the unit can become serious quickly.

4. Stop Using Fixtures and Drains

Once water is off, stop using plumbing fixtures. Do not flush toilets, run sinks, take showers or use the washing machine.

Running toilets can waste water and make leaks worse. If a toilet is overflowing, remove the tank lid and lift the float or flapper. Then turn off the small valve behind the toilet.

If drains are backing up, avoid using any nearby fixtures. Water from one drain can rise in another if the sewer line is blocked.

Do not use chemical drain cleaners during an emergency. They can damage pipes and create hazards for the plumber.

5. Move Items Away From Water

Now protect your home and belongings. Move furniture, rugs, boxes and electronics away from wet areas.

Use towels, buckets or containers to catch dripping water. If water is coming through the ceiling, place a bucket below it. Keep people and pets away from the area.

For standing water, use a mop, towels or a dry vacuum designed for wet cleanup. A standard household vacuum is not safe for water. Only use a dry vacuum if it is rated for wet use.

This step helps reduce water damage while you wait for repair services.

6. Take Photos and Notes

Before cleanup goes too far, take pictures or short videos. Capture the leak, damaged areas and anything affected by water.

This can help with insurance claims. It also helps the plumber understand what happened before they arrived.

Write down when the issue started, what you noticed first and what you already did. Simple notes can save time.

For example, tell the plumber, “I turned off the water at 8:15 AM,” or “The toilet started overflowing after the shower drained.”

7. Call Zierman Plumbing

The more details you provide, the better we can prepare.

Once the situation is stable, call for professional plumbing help. Emergency services are important when water is spreading or a fixture is out of commission.

Tell our dispatcher what happened. Mention whether you shut off the main water supply. Also share whether the issue involves your water heater, sump pumps, running toilets, sewer backups or major leaks.

8. Avoid DIY Repairs That Could Make Things Worse

It may be tempting to patch a pipe, remove a fixture or restart equipment. In most emergencies, it is better to wait.

Temporary actions, like placing a bucket or shutting off valves, are helpful. But deeper repairs should be handled by trained technicians.

Plumbing problems can involve pressure, gas lines, sewer waste or electrical risks. A small mistake can increase repair costs or cause more damage.

If your home has sump pumps, do not unplug or reset equipment repeatedly unless instructed. The pump may be protecting your basement or crawl space from flooding.

9. Keep the Area Clear for the Plumber

Before the plumber arrives, clear a path to the problem area. Move storage, furniture or cleaning supplies if it is safe.

Keep children and pets away from work zones. Make sure the technician can access shutoff valves, the water heater, crawl space or garage.

This helps repair services begin quickly.

10. Know When to Leave the Home

Homes can be rebuilt, but your safety matters most.

Leave immediately if you notice sewage exposure, electrical hazards, structural ceiling damage or gas smells (especially near gas water heaters).

Final Step: Get the Problem Fixed the Right Way

A plumbing emergency is stressful, but quick action can limit damage. Turn off the water, protect your home and call a professional.

Zierman Plumbing & Heating provides emergency services for homeowners facing leaks, water heater problems, burst pipes and other urgent plumbing issues. When you need calm, experienced help, call Zierman and consider it done.

Water heater maintenance near me
31Aug

Tank vs. Tankless Water Heaters: Which Is Better for Your Home?

Choosing a new water heater is a big decision for any homeowner. You want reliable hot water without spending more than necessary.

Two common options are traditional tank water heaters and tankless water heaters. Both have advantages, but they work differently.

At Zierman Plumbing & Heating, we help Santa Maria homeowners compare their options. Our goal is to find the right system for your household. Here’s what you should know before making your choice.

How Does a Traditional Tank Water Heater Work?

A traditional water heater stores hot water in an insulated tank. Most residential models hold between 30 and 80 gallons. The system heats stored water and maintains its temperature throughout the day. When you turn on a faucet, hot water flows from the tank. As you use water, cold water enters the tank for heating.

Benefits of Tank Water Heaters

Traditional water heaters remain popular for several reasons.

  • Lower upfront costs: Tank models usually cost less to purchase and install.
  • Familiar technology: Most plumbers can service common tank water heater models.
  • Simple replacement: Replacing an existing tank often requires fewer system changes.
  • Reliable capacity: A properly sized tank supports normal daily household use.

These benefits make tank systems practical for many Santa Maria homes.

Drawbacks of Tank Water Heaters

A tank holds a limited supply of hot water.

Long showers and back-to-back laundry loads can empty that supply. Once depleted, the tank needs time to heat more water.

Traditional models also experience standby heat loss. This means some energy goes toward keeping stored water warm.

Most tank water heaters last around 8 to 12 years. Maintenance and local water conditions can affect that lifespan.

If your current system is aging, watch for these signs it’s time to replace your water heater.

How Does a Tankless Water Heater Work?

A tankless water heater heats water as you need it.

When you open a hot water tap, water passes through a heating system. Gas burners or electric elements raise the water temperature.

The system stops heating when you close the tap.

Unlike traditional models, tankless systems don’t store large amounts of hot water.

Benefits of Tankless Water Heaters

Tankless models offer several advantages.

  • On-demand heating: Hot water continues while the system operates within its capacity.
  • Improved efficiency: The system avoids most standby storage heat losses.
  • Space savings: Wall-mounted units free up valuable floor space.
  • Longer lifespan: Many tankless models can last 20 years or more with proper care.

Tankless water heaters often appeal to homeowners planning long-term upgrades.

Drawbacks of Tankless Water Heaters

Tankless systems usually cost more upfront.

Some homes also need changes to gas lines, venting or electrical connections. These improvements can increase installation costs.

Another consideration is flow rate.

A tankless water heater can only heat a certain amount of water simultaneously. Heavy demand may exceed its capacity.

Proper sizing helps prevent performance problems.

Tank vs. Tankless Water Heaters: Key Differences

FeatureTank Water HeaterTankless Water Heater
Upfront costUsually lowerUsually higher
Hot water supplyLimited by tank sizeContinuous within flow capacity
Energy efficiencyStandby heat lossLess standby loss
Space neededLarger footprintUsually more compact
Typical lifespan8–12 yearsOften 20+ years
MaintenanceRoutine tank carePeriodic descaling and service

Neither system is automatically better for every household.

Your budget, hot water habits and existing plumbing all matter.

Which Water Heater Is More Energy Efficient?

Tankless water heaters are often more energy efficient.

They heat water when needed instead of maintaining a stored supply. This can reduce wasted energy throughout the day.

However, actual savings depend on several factors.

Your household’s water use plays a major role. Fuel type and equipment efficiency also affect operating costs.

For some homeowners, energy savings may not quickly offset higher installation costs.

A professional comparison should consider both initial and long-term expenses.

Which Water Heater Is Best for Larger Families?

Large households often use hot water in several places simultaneously.

Someone may shower while another person runs the dishwasher. A washing machine might also be operating.

A properly sized tank system can serve these needs effectively.

A tankless system can also work well. However, it must provide enough flow for simultaneous fixtures.

In some homes, multiple tankless units may be needed.

Zierman can review your household’s usage before recommending equipment.

What About Six-Year and Ten-Year Water Heater Warranties?

Warranty coverage is another important factor.

Some traditional water heaters offer six-year limited warranties. Other models provide ten-year coverage.

A longer warranty may offer added protection, but terms differ between manufacturers.

Review what each warranty actually covers.

For example, a warranty might cover the tank but exclude labor. Registration and maintenance requirements may also apply.

Don’t choose equipment based only on the warranty length.

Consider installation quality, expected lifespan and future maintenance costs.

Ask Zierman Plumbing & Heating about available six-year and ten-year warranty water heaters.

Our team can explain the options available for your home.

Which System Makes Sense for Santa Maria Homeowners?

Many Central Coast homes have different plumbing layouts and hot water demands.

Older homes may require additional work before installing tankless equipment.

Households with limited installation space might appreciate a compact tankless model.

Meanwhile, homeowners replacing an existing tank may prefer a straightforward installation.

Local water hardness can also affect maintenance needs. Mineral buildup can reduce performance in either system.

The best choice depends on your home’s specific conditions.

Whether you prefer a tank or tankless model, our water heater replacement and repair services can help you make a confident decision.

Professional Water Heater Installation Matters

Even the best equipment needs proper installation.

Incorrect sizing can lead to poor hot water performance. Improper venting or connections may also create safety concerns.

A licensed plumber can assess equipment requirements and applicable building codes.

Professional installation also helps protect manufacturer warranty coverage.

At Zierman Plumbing & Heating, we’ve served the Santa Maria area since 1950.

We offer both traditional and tankless water heater services. Our team explains your options and provides upfront pricing.

Our professional water heater installation services help homeowners enjoy dependable hot water with equipment suited to their needs.

Find the Right Water Heater for Your Home

Still deciding between a tank and tankless water heater? Zierman Plumbing & Heating can help you compare your options. We’ve served Santa Maria and nearby Central Coast communities since 1950.

Our team can recommend a system that fits your budget and hot water needs.

Ready to upgrade? Contact Zierman Plumbing & Heating today to request a quote and find the right water heater for your home.

Clogged Drain
20Jul

Drain Cleaning Methods Explained: Snaking vs. Hydro Jetting

A clogged drain can start as a slow sink and quickly turn into a major plumbing problem. The right solution depends on what’s causing the blockage, where it’s located and the overall pipe condition.

When comparing hydro jetting vs snaking, both are proven drain cleaning methods, but they solve different problems. Understanding how each works can help you choose the best option, prevent future clogs and protect your plumbing system.

What Is Drain Snaking?

Drain snaking is one of the most common drain cleaning methods used by plumbers. A flexible cable with a specialized cutting or retrieval head travels through the drain opening to break apart or remove an obstruction.

Drain snaking works well for:

  • Minor clogs caused by hair or debris
  • Small amounts of food particles
  • Bathroom sink and shower drains
  • Kitchen sinks with localized blockages

Because the snake creates an opening through the clog, water can begin flowing again. However, it usually doesn’t remove all the buildup that’s attached to the pipe walls.

What Is Hydro Jetting?

Hydro jetting, also known as water jetting, uses pressurized water to clean the inside of your plumbing system. Specialized equipment delivers high pressure water through a hose and nozzle at up to 4,000 psi, blasting away years of buildup without harsh chemicals.

Unlike snaking, hydro jetting cleans the full diameter of the pipe instead of simply creating a path through the blockage.

Hydro jetting is highly effective for removing:

  • Grease buildup
  • Soap scum
  • Food particles
  • Mineral deposits
  • Tree roots inside a sewer line

Because it thoroughly cleans the pipes, professional drain cleaning with hydro jetting often provides a longer-lasting solution than snaking alone.

Hydro Jetting vs. Snaking: What’s the Difference?

When homeowners search for hydro jetting vs snaking, they’re usually trying to determine which option is more effective.

The biggest difference is that drain snaking removes or punctures a blockage, while hydro jetting cleans the entire interior of the pipe.

FeatureDrain SnakingHydro Jetting
Best forMinor clogsHeavy buildup and recurring blockages
Cleaning abilityOpens a path through the clogCleans the entire pipe
Removes greaseLimitedExcellent
Removes tree rootsSometimesMuch more effective
Cleans pipe wallsNoYes
Good for multiple drains backing upLimitedYes
Helps prevent future clogsLimitedYes

If you’re deciding between jet vs snaking, the right choice depends on the type of blockage and the condition of your plumbing.

When Is Drain Snaking the Better Choice?

Drain snaking is often recommended when:

  • The clog is isolated to one fixture.
  • The blockage is close to the drain opening.
  • The issue developed recently.
  • Your plumbing system is otherwise working properly.

For many homeowners, it’s a fast and cost-effective solution for everyday drain problems.

When Should You Choose Hydro Jetting?

Because hydro jetting removes buildup from the pipe walls, it can help restore proper water flow and reduce future blockages. It’s usually the better option when:

  • Multiple drains are backing up.
  • You experience recurring drain problems.
  • Grease has built up inside the sewer line.
  • Tree roots have entered the plumbing system.
  • You want a more complete cleaning method.

Is Hydro Jetting Safe for Pipes?

When performed by experienced professionals, hydro jetting is safe for most modern plumbing systems. Before beginning the process, a plumber evaluates the pipe condition to determine whether hydro jetting is appropriate.

Older pipes with existing cracks, corrosion or structural issues may require repairs before hydro jetting is recommended.

Professional Drain Cleaning You Can Trust

Whether you need drain snaking for a simple blockage or hydro jetting to restore your sewer line, choosing the right solution protects your plumbing and helps prevent costly repairs.

At Zierman Plumbing & Heating, we’ve been helping homeowners throughout Santa Maria and the Central Coast since 1950. Our experienced technicians evaluate every clogged drain, inspect the pipe condition and recommend the most effective cleaning method for your home. Whether it’s a routine drain cleaning or a more serious sewer line issue, you can count on honest recommendations and quality workmanship every step of the way.

Frequently Asked Questions

Which is better, hydro jetting or snaking?

Neither method is always better. Drain snaking works well for minor clogs, while hydro jetting is ideal for heavy buildup, recurring drain problems and cleaning an entire sewer line.

Does hydro jetting remove tree roots?

Yes, but severe root intrusion may still require pipe repair and/or replacement.

How much pressure does hydro jetting use?

Most professional water jetting equipment operates with pressurized water between 3,000 and 4,000 psi, depending on the application and pipe condition.

Can hydro jetting clean kitchen sinks?

Yes. Hydro jetting effectively removes grease, soap scum and food particles that commonly build up in kitchen sinks, helping restore proper drainage and reduce recurring clogs.

Schedule Professional Drain Cleaning Today

A clogged drain may seem like a minor inconvenience, but recurring blockages can point to a larger problem inside your plumbing system. Whether you need a simple drain snaking service or the deep cleaning power of hydro jetting, choosing the right solution can help prevent costly repairs and keep your plumbing flowing smoothly.

At Zierman Plumbing & Heating, we’ve been providing trusted plumbing services to homeowners throughout Santa Maria and the Central Coast since 1950. Our experienced technicians will inspect your drains, identify the source of the problem and recommend the most effective cleaning method for your home, never upselling services you don’t need.

Don’t wait for a small clog to become a plumbing emergency. Contact Zierman Plumbing & Heating today to schedule professional drain cleaning and get your plumbing system back to working the way it should. Book your appointment today and consider it done.

24Apr

Signs It’s Time for a Hot Water Tank Replacement

A hot water tank replacement usually becomes necessary when your current unit can’t keep up anymore. You may notice leaks around the base, rusty water, strange noises or water that runs cold too quickly. In many homes, these warning signs show up as the unit gets older and less reliable.

If your system is more than 8 to 12 years old, it may be smarter to plan for water heater replacement before a major failure causes damage. Waiting too long can leave you without hot water and may also lead to water damage around the tank.

Water Heater Replacement or Repair: How to Decide

Not every problem means you need a full replacement. In some cases, a repair can get your system working again. Still, repeated repairs, inconsistent heating and visible corrosion often point to the need for a new unit.

When comparing repair with water heater installation, think about long-term value. A newer unit can improve performance, reduce breakdowns and give your household more dependable hot water. For homeowners who want fewer service calls and better day-to-day comfort, replacement is often the better investment.

Cost to Replace Hot Water Heater Systems

For homeowners in Santa Maria and across Southern California, the cost to replace hot water heater systems can vary quite a bit based on the type of unit, the installation setup and any code upgrades required. As a rough local benchmark, a standard tank replacement often lands around $2,000 to $4,300 installed, while a tankless water heater upgrade is often closer to $4,000 to $7,500 installed. California pricing sources also note that Santa Maria-area tank units may start lower in simpler situations, with local estimates showing about $800 to $2,500 for the tank itself and $50 to $300+ for permits and inspections, before factoring in labor and any job-specific upgrades.

The final price usually depends on tank size, gas or electric setup, venting, access to the unit and whether your home needs updates to meet current code. A straightforward swap in the same location will usually cost less than a job that involves new venting, plumbing changes or a move to water on demand with tankless equipment. That’s why the most accurate number comes from an in-home inspection, not a one-size-fits-all online estimate

Choosing the Right Size for Hot Water and Water Usage

A replacement should match your home’s daily demand. If your household uses a lot of hot water in the morning or evening, the wrong size can lead to frustration fast. Looking at water usage helps determine whether you need a larger tank, faster recovery or a different system design.

A small household may do well with a standard tank that offers steady performance and lower upfront cost. A larger household may need a system that delivers more hot water without running out during peak times.

Tankless Water Heater vs Traditional Tank

For some homeowners, a traditional tank is the most practical choice. It offers familiar performance and can make water heater installation simpler when you’re replacing an existing unit with a similar model.

For others, a tankless water heater is worth a closer look. These systems provide water on demand, which means they heat water as it’s needed instead of storing it in a tank. They can save space and may be more energy efficient over time. Still, switching to tankless may require upgrades to venting, gas lines or electrical service, so it’s important to compare both options carefully before making a decision.

Service / ComponentStandard Tank SystemTankless (On-Demand)
Unit Cost$800 – $2,500$1,500 – $3,500+
Professional Labor$600 – $1,800$1,500 – $4,000
Permits & Inspections$50 – $300+$100 – $500
Total Estimated Price$2,000 – $4,300$4,000 – $7,500+

Energy Efficient Water Heater Installation Benefits

New models are often far more energy efficient than older ones. That can mean lower monthly bills and more reliable performance. A new unit may also heat faster, recover more efficiently and deliver more consistent hot water throughout the day.

If you’re thinking about overall home efficiency, it also helps to look at related systems. For example, homeowners comparing comfort upgrades may also want to read about heating choices when planning future improvements.

Protecting Your System From Hard Water and Sediment

Water quality plays a bigger role than many homeowners realize. Hard water can create mineral buildup inside the tank, which affects heating performance and shortens equipment life. Sediment can also collect at the bottom of the tank and make the unit work harder than it should.

If you suspect mineral issues in your home, take a look at hard water signs. Catching those problems early can help protect your new system and improve long-term performance.

Water Heater Installation Maintenance After Replacement

Once your new unit is in place, regular upkeep matters. Basic maintenance can help extend the life of the system and keep performance steady. Flushing sediment, checking valves and inspecting key parts can all help prevent future issues.

For homeowners who want to better understand this process, see our guide on draining a heater.

How Water on Demand and Smart Habits Can Lower Waste

Replacing an old unit is a good step, but daily habits matter too. Whether you choose a standard tank or a tankless water heater with water on demand, reducing unnecessary strain on your plumbing system can improve efficiency.

Simple changes can lower water usage and reduce waste across your home. For more practical ideas, our tips on saving water can help.

Ready for the Professionals?

If your current unit is failing or you’re ready to upgrade, Zierman Plumbing can help you choose the right solution for your home. From straightforward water heater replacement to guidance on tankless options, our team delivers honest recommendations, quality workmanship and dependable service backed by decades of local experience.

Contact Zierman Plumbing to schedule your appointment today!

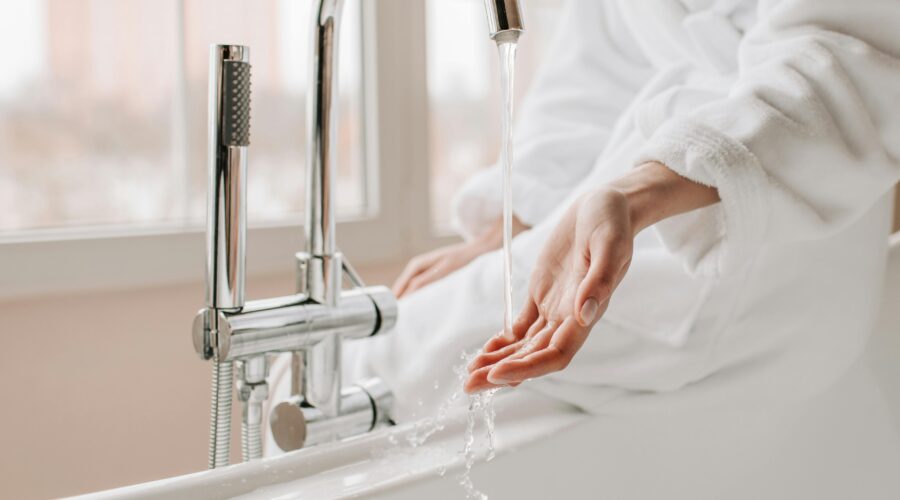
Woman's hand tests water from a bathtub faucet
20Apr

Finding Your Reason For Hard Water

If you have cloudy dishes, soap scum, dry skin or white buildup on faucets, there’s usually a clear reason for hard water in your home.

In most cases, hard water comes from dissolved calcium and magnesium in the local water supply. As water moves through mineral-rich rock, it picks up minerals before it reaches your plumbing system. That mineral content affects water quality and changes how water behaves throughout your home.

It usually isn’t a health risk, but it can create frustrating problems with cleaning, appliances and plumbing performance.

What Is the Main Reason for Hard Water?

Mineral content.

Hard water forms when groundwater or municipal water passes through rock and collects minerals, especially calcium and magnesium. In many areas, that means the water entering your home already contains a high mineral load before it reaches your fixtures, pipes and appliances.

Some regions have naturally harder water because of the minerals in the ground and the way local water supplies are sourced and treated.

Hard Water and Soft Water Explained

Hard water contains higher levels of dissolved minerals, mainly calcium and magnesium. These minerals leave residue behind. Over time, they can create scale on faucets, showerheads, pipes and appliances.

Soft water contains far fewer of those minerals. It lathers better with soap, leaves less residue and is generally easier on plumbing fixtures and household appliances.

  • Hard water leaves mineral deposits and creates more soap scum.
  • Soft water rinses cleaner and helps soap work more effectively.

If your sinks, tubs and shower doors always seem to have a film on them, hard water may be the reason.

Signs You May Have Hard Water

  • White or chalky buildup on faucets
  • Spots on glasses and dishes
  • Reduced soap lather
  • Stiff laundry
  • Dry skin or dull hair
  • Scale around showerheads
  • Reduced performance from water heaters

How Hard Water Affects Plumbing and Appliances

Mineral buildup can collect inside pipes and other appliances that heat water. Over time, that buildup can restrict water flow and force equipment to work harder than it should. That’s especially true for water heaters, which are highly vulnerable to scale.

If sediment and mineral deposits collect in the tank, your unit may lose efficiency. It may take longer to heat drinking water and hot water for daily use. In some cases, buildup can shorten the life of the unit.

That’s one reason many homeowners look for ways to extend the life of their water heater. When hard water is present, regular maintenance becomes even more important.

Why Hard Water Makes Cleaning Harder

Soap doesn’t work as well in hard water. Instead of rinsing clean, it reacts with minerals and leaves behind residue. That’s where soap scum comes from.

This can affect:

  • Sinks
  • Showers
  • Bathtubs
  • Glassware
  • Clothing
  • Skin and hair

The more mineral-heavy the water is, the harder it becomes to keep surfaces clean. You may end up using more soap, more detergent and more time scrubbing.

Can Water Softening Help?

Yes. Water softening can reduce mineral content and help protect your plumbing system.

A water softener removes the minerals that cause hardness, which can improve cleaning, reduce scale and help appliances run more efficiently. Homeowners often notice softer laundry, cleaner dishes and less residue on fixtures once treatment is installed.

If hard water is affecting daily comfort or causing repeated plumbing issues, water softening may be worth considering.

Water Heater Maintenance Matters

When hard water is present, regular flushing can help remove some of its buildup. For homeowners who want to extend the life of a water heater, this simple maintenance step can make a real difference.

Draining an electric water heater should be done carefully, with power shut off first and the manufacturer’s instructions followed closely. If you’re unsure, it’s best to have a licensed plumber handle it. A professional can inspect the unit, flush sediment safely and check for signs of damage caused by hard water.

How Calcium Carbonate Builds Up in Your Plumbing

Calcium carbonate is one of the main minerals behind hard water scale. When hard water is heated or left to dry on surfaces, calcium carbonate can separate from the water and stick to metal, glass and plumbing parts. That’s why you may see a white, chalky crust on faucets, showerheads and inside appliances.

Over time, this buildup can narrow pipe openings, reduce water flow and make water heaters work harder than they should. It can also leave spots on dishes and add to soap scum problems. Catching this buildup early can help protect plumbing and improve overall water quality.

When to Call a Plumber

If you’re seeing buildup on fixtures, poor hot water performance or other signs, it may be time for a professional inspection.

A plumber can help determine whether hard water is affecting your home and recommend the right next step. That might include maintenance, fixture cleaning, water heater service or a long-term treatment option.

Understanding the reason for hard water is the first step. Once you know what’s causing it, you can make better choices for your plumbing system.

At Zierman Plumbing & Heating, we believe homeowners deserve clear answers and honest solutions. If hard water is creating problems in your home, our team’s here to help you keep your system working the way it should.

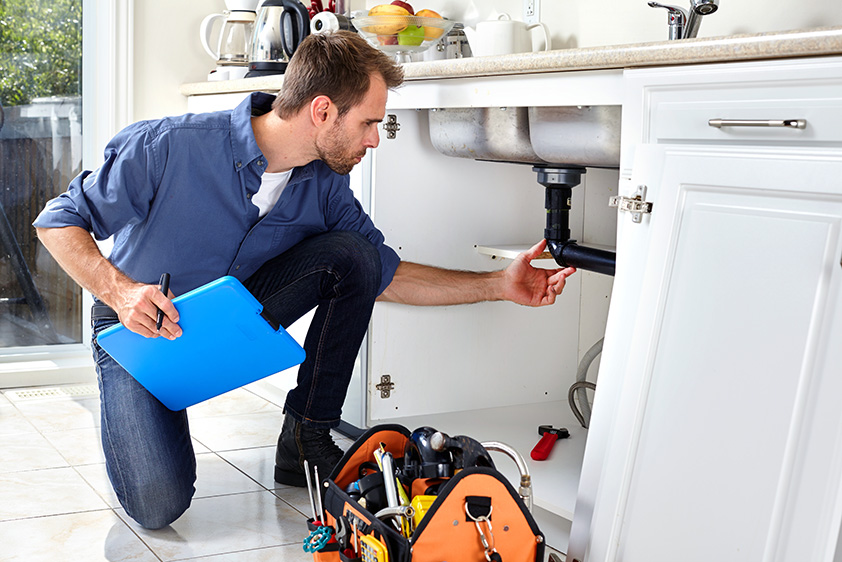
Plumber checking pipes under kitchen sink.
26Mar

What Pipe Relining Means For Your Home

Pipe relining gives homeowners a smart way to fix underground plumbing without tearing up the yard, driveway or slab. When a sewer line starts failing, most people picture trenches, noise and days of disruption. That used to be the standard approach. Today, pipe relining offers a cleaner option that restores flow and helps extend the life of the existing line.

This process is often used when a sewer pipe has cracks, corrosion, root intrusion or worn sections as a result of neglect over time. In many homes, these issues build slowly. You may notice frequent drain backups, slow drains, foul odors or soggy areas outside. Those warning signs often point to trouble below the surface. The problem won’t usually fix itself, and delays can lead to bigger damage.

Pipe relining is a trenchless repair method that creates a new pipe inside the old one. After the line is inspected and cleaned, a flexible liner coated with resin is inserted into the damaged section. That liner is then expanded and cured in place. Once it hardens, it forms a strong inner wall that seals cracks and restores the line. In many cases, the result is a smooth, durable surface that improves flow and reduces the chance of future blockages.

For homeowners, one of the biggest benefits is less disruption. Traditional excavation can mean digging through landscaping, concrete or hardscaping just to reach the broken line. That adds labor, cleanup and repair costs after the plumbing work is done. With pipe lining, access is often gained through existing entry points, which helps keep the property more intact. That matters when you want the problem fixed without turning your yard into a construction zone.

Pipe Lining for Damaged Pipes

This option also works well for many kinds of damaged pipes. Older sewer lines made from clay, cast iron or Orangeburg material can break down over time. Tree roots can force their way into small openings and expand the damage. Soil movement can also shift the line and create weak spots. In the right conditions, relining can address those failures without full replacement. It won’t be the answer for every situation, but it can be an excellent solution when the pipe still has enough structure to support the liner.

A camera inspection is the first step in deciding whether relining makes sense. The inspection shows where the damage is, how severe it is and whether the line is a good candidate. If the pipe has collapsed or has major sections missing, full replacement may still be necessary. But when the issue involves cracks, leaks or root intrusion, relining can often deliver lasting pipe repair with far less mess.

Homeowners sometimes ask whether relining is just a temporary patch. It isn’t meant to be a shortcut. When installed correctly, it creates a solid interior barrier that resists corrosion and helps prevent leaks. Because the new lining covers joints and small gaps, it can also make it harder for roots to re-enter the line. That added protection is one reason many property owners see it as a long-term investment instead of a quick fix.

Another reason people choose this approach is speed. Excavation projects can stretch on when crews need to cut concrete, remove soil and rebuild surfaces afterward. Relining is often completed faster, which reduces downtime and helps households get back to normal sooner. That can be especially important when the main sewer line is involved and the home’s plumbing use is limited during repairs.

Costs Over Time

While every job is different, the total cost of relining can be competitive because it may reduce restoration work after the plumbing repair is finished. Digging up a line is only part of the expense. Replacing landscaping, walkways or driveway sections can push the final bill much higher. A trenchless option may help avoid many of those added costs, which is why homeowners often look into it before committing to excavation.

If recurring drain issues keep coming back, it may be time to look deeper into the cause. Hidden sewer line problems often continue until the source of the damage is fixed. Pipe relining gives homeowners a practical way to restore service, protect the property and avoid major excavation. When conditions are right, it’s an efficient repair method for a failing sewer pipe, a reliable answer for damaged pipes and a modern form of pipe repair that keeps disruption to a minimum. With professional inspection and proper installation, pipe lining can turn a stressful plumbing problem into a much more manageable one.

Zierman Pipe Relining Services

At Zierman Plumbing, we inspect sewer lines carefully, explain your options clearly and recommend the right fix for your home. If pipe relining is the best solution, we use proven methods to restore your line with less disruption and lasting results. Zierman Plumbing is here to help with honest guidance, professional pipe repair and dependable service for damaged pipes and every sewer pipe issue that affects your home.

11Mar

How to Drain an Electric Water Heater

Draining an electric water heater is a common maintenance task that removes sediment from the tank. Sediment forms when minerals settle at the bottom of the heater. Over time, this buildup can reduce heating efficiency and shorten the system’s lifespan.

To drain an electric water heater, first turn off power at the circuit breaker. Then shut off the cold water supply valve on top of the tank. Attach a garden hose to the drain valve at the bottom of the heater and run the hose to a floor drain or outside. Open a hot water faucet somewhere in the house to allow air into the plumbing system. Finally, open the drain valve and allow the tank to empty. The process usually takes 30–45 minutes.

This maintenance removes sediment that collects inside the tank. Sediment can cause rumbling noises, lower efficiency and increase energy costs. Research shows buildup can reduce water heater efficiency by 10–15 percent.

However, draining a water heater is not always a safe DIY project. Electric water heaters contain pressurized hot water and heating elements. If power is not turned off correctly, the heating elements can burn out. Improper draining can also damage the drain valve or leave sediment trapped in the tank.

For those reasons, many homeowners choose to have a professional plumber perform water heater maintenance.

Below, we explain the basic draining process. Then we show why professional service is often the safer option.

Why You Should Drain an Electric Water Heater

Over time, minerals from water settle at the bottom of the tank. This sediment layer forms inside the water heater.

Sediment buildup can cause several problems:

  • Reduced heating efficiency
  • Popping or rumbling noises inside the tank
  • Damage to heating elements
  • Increased energy bills
  • Shorter water heater lifespan

Flushing or draining the tank removes this buildup. It helps the heating elements operate efficiently and keeps the system running longer.

Most manufacturers recommend draining a tank once per year as routine maintenance.

Preparation: What to Do Before Draining Your Water Heater

Before draining an electric water heater, proper preparation is essential for safety.

Start with these steps.

Turn Off the Power

Locate the circuit breaker that controls the water heater. Turn it off completely. This step prevents the heating elements from operating while the tank is empty.

Running heating elements without water can destroy them.

Shut Off the Cold Water Supply

Next, locate the cold water inlet valve at the top of the heater. Turn the valve clockwise to stop water entering the tank.

Allow the Water to Cool

If the heater recently ran, the water inside may be very hot. Allow time for the tank to cool before draining it.

This reduces the risk of burns.

Gather the Necessary Tools

Most water heater draining jobs require only a few basic tools.

Common tools include:

  • Garden hose
  • Bucket
  • Flathead screwdriver
  • Floor drain access

Step-by-Step: How to Drain an Electric Water Heater

Once preparation is complete, you can begin draining the tank.

Step 1: Turn Off the Circuit Breaker

Always start by shutting off power to the heater. This prevents damage to the heating elements.

Step 2: Shut Off the Cold Water Supply

Turn the cold water inlet valve to stop additional water entering the tank.

Step 3: Attach a Garden Hose to the Drain Valve

The drain valve is located near the bottom of the water heater tank. Attach a hose to direct water safely away.

Run the hose to a floor drain or outside.

Step 4: Open a Hot Water Faucet

Open a hot water faucet somewhere in the home. This allows air into the plumbing system and prevents a vacuum.

Water will drain faster when air enters the system.

Step 5: Open the Drain Valve

Use the valve handle or a screwdriver to open the drain valve. Water will begin flowing through the hose.

Step 6: Allow the Tank to Empty

Let the tank drain completely. This process usually takes 30–45 minutes depending on tank size.

Step 7: Flush Remaining Sediment (Optional)

If heavy sediment remains, briefly turn the cold water supply on. This helps stir up debris so it flushes out.

Step 8: Refill the Tank

Close the drain valve and remove the hose. Turn the cold water supply back on.

Leave a hot water faucet open until water flows smoothly. This removes air from the system.

Step 9: Restore Power

Once the tank is completely full, restore power at the breaker.

Never turn the power back on while the tank is empty.

How Long Does It Take to Drain a Water Heater?

Draining a water heater typically takes 30 to 45 minutes.

However, several factors can affect draining time:

  • Tank size
  • Sediment buildup
  • Water pressure
  • Drain valve condition

Older water heaters with heavy sediment may drain more slowly.

DIY vs Professional Water Heater Draining

Many homeowners attempt to drain their water heater themselves. While this is possible, it can also create problems.

FactorDIY DrainProfessional Service
SafetyRisk of burns or electrical damageSafe procedures and tools
Sediment RemovalOften incompleteFull tank flush removes buildup
InspectionUsually skippedPlumber checks valves and heating elements
Risk of DamagePossible drain valve failureReduced risk of costly mistakes
Long-Term EfficiencyLimited improvementOptimized heater performance

Professional plumbers often perform a full water heater flush, not just a simple drain.

During maintenance, technicians may also inspect:

  • Heating elements
  • Temperature and pressure relief valve
  • Water supply connections
  • Signs of corrosion or leaks

This helps prevent expensive water heater failures.

Common Problems When Draining a Water Heater

Some homeowners encounter issues during the draining process.

Common problems include:

Clogged Drain Valve

Sediment can block the drain valve. When this happens, water may not flow properly.

Water Heater Won’t Drain

Air may not be entering the system. Opening a hot water faucet usually fixes this.

Sediment Blocking the Tank

Heavy sediment buildup can slow draining. A professional flush may be required.

Tank Not Refilling Properly

Air trapped in plumbing lines can prevent proper refilling.

How Often Should You Drain a Water Heater?

Most experts recommend draining a tank once per year.

Homes with hard water may need flushing every six months.

Regular maintenance helps:

Signs Your Water Heater Needs Flushing

Your water heater may need maintenance if you notice these warning signs:

  • Rumbling or popping noises from the tank
  • Cloudy or dirty hot water
  • Reduced hot water supply
  • Rising energy bills
  • Inconsistent water temperature

These symptoms often indicate sediment buildup inside the tank.

When to Call a Professional Plumber

While some homeowners attempt DIY maintenance, many situations require professional help.

Consider calling a plumber if:

  • The drain valve is clogged
  • Sediment buildup is severe
  • The water heater is older than 8–10 years
  • You notice leaks or corrosion
  • The heater stops producing hot water

Professional maintenance ensures the tank is fully flushed and inspected for damage.

Regular service can help prevent costly water heater replacement.

Need Help With Your Water Heater?

Draining a water heater sounds simple, but sediment buildup, stuck drain valves and electrical safety issues can turn it into a bigger problem.

At Zierman Plumbing & Heating, our technicians perform a complete water heater flush and inspection. We remove sediment, check safety valves and make sure your system runs efficiently.

With 75+ years serving Santa Maria homeowners, you can trust our team to get the job done right.

Call Zierman Plumbing today to schedule water heater maintenance and keep your hot water running reliably.

Scroll to top