Oh no! You set your rings on the bathroom counter while you were washing your hands, but accidentally knocked one into the sink and it went down the drain!
Or maybe your toddler thought it was fun to watch a small toy soldier “go on an adventure” down the kitchen sink.
The potential scenarios are almost endless, but whatever your item that has journeyed into the watery depths of the household plumbing, there is a good chance you can retrieve it yourself with a little know-how and a couple of basic tools. Here’s what to do.
First, if the water is running in the sink, immediately turn it off.
Next, with the aid of a flashlight, look down inside the drain to see if you can spot the object. If you’re lucky, it’s not far down the pipe and you can pull it out with a long tweezer, grabber or even a hanger bent into a loop.
If you can’t see the item, however, you’ll need to switch into DIY plumber mode.
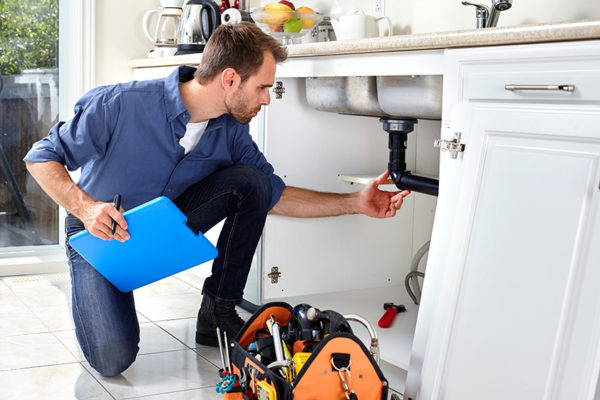
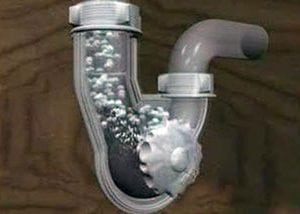
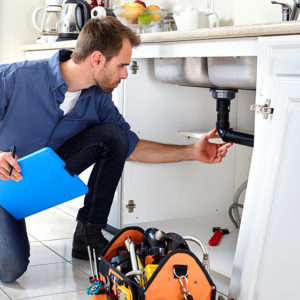
1. Take a look underneath the sink. You’ll see that the plumbing extends straight down, but then curves back upward into a “U” shape. The bottom curve of that U is the P-trap, and most likely, your lost item is sitting inside it.
2. Set a bucket underneath the P-trap before going any further.
3. Now you’ll need to loosen the slip nuts that hold the P-trap in place. In many homes, they are made of plastic and you’ll be able to loosen them by hand. If not, you’ll need to use an adjustable wrench to loosen them. (Remember, “Lefty loosey, righty tighty.”)
4. Carefully remove the P-trap. Be prepared for water and gunk to drain into the bucket. Hopefully, your lost item will fall out as well.
5. After retrieving your jewelry or other item, wipe any build-up of grunge out of the pipe, and then place it back into its proper position.
6. Re-tighten the slip nuts, and then turn the water supply back on.
7. Before removing the bucket, make sure there are no leaks underneath the sink.
Generally, this entire procedure is a simple one, but if you are unable to retrieve your lost item, or your plumbing situation is more complicated than the typical home setup, it’s time to call a plumbing professional.
Ugh. A clogged drain. Whether it’s your kitchen sink, your bathroom basin or the tub, facing an ugly brew of dirty water and drain contents is on nobody’s list of a good time.
Although it’s tempting to tackle the problem yourself, that can sometimes lead to even worse problems – even medical emergencies. While your best bet is to call a plumbing professional, if you do decide to give DIY a try, watch out for these five common mistakes.
1. Letting It Happen to Begin With
The easiest way to conquer a clogged drain is to prevent the problem from happening in the first place. Drains are designed to handle fluids – not hair, stringy vegetable peelings or oversize wads of tissue paper.
Spare yourself annoyance by using a hair catcher in the shower or tub when it’s time to shampoo, dumping vegetable peelings and similar kitchen materials into the trash (or even better, the compost pile) and teaching your kids not to go overboard on paper use.
2. Careless Use of Caustic Chemicals
If your first reaction when the tub or sink drains slowly is to reach for a chemical drain opener, watch out. These highly caustic chemicals can burn you severely, so a careless moment — or even worse, vigorous plunging after pouring in chemicals – can lead to an emergency room visit.
Not only that, chemical drain cleaners don’t work on solid clogs, such as hair, food or paper. Plus, overuse of these toxic products can actually erode or break down your pipes.
3. Sticking Things Down the Drain
Another common response to a clogged or slow drain is to grab the nearest broom handle, kitchen knife or coat hanger and stuff it down the drain to try and fish out the clog.
While this is occasionally effective if the drain is full of hair right near the surface, chances are, you won’t be able to reach the blockage.
If you do reach it, however, you risk pushing it even further down, or simply getting the tool stuck in the pipe. Now you have an even bigger problem to deal with.
4. Grabbing the Garden Hose
It seems reasonable; use water pressure from a garden hose to blast the clog away.
Unfortunately, what’s likeliest to happen in this scenario is either: 1. You damage the pipe, or 2. Water erupts out of the drain and into your face. Neither is a good outcome.
5. Using the Wrong Plunger
While proper use of the right plunger can be very effective, too many homeowners don’t know the right way to plunge. First off, use the right plunger: toilet plungers have a cup or bell-shaped bottom, while sink plungers are flat.
Once you have the plunger in place, make sure the drain is completely sealed, and then slowly and methodically work the plunger up and down, keeping the seal intact.
Don’t make the common mistake of quickly plunging up and down as if you’re doing an arm workout – this is ineffective at best and at worst, will blast dirty water all over you and the floor.
Your water heater works hard for your family every day, so don’t neglect to do your part and provide regular maintenance. Implementing our easy 5 step water heater maintenance checklist will go a long way in prolonging the life of your water heater and preventing problems that arise due to neglect.
Follow these simple tips to regularly maintain and protect your water heater.
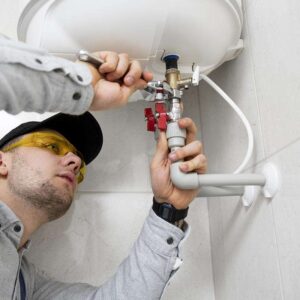
But don’t forget: your water heater is full of extremely hot water and steam, and thus wearing gloves, eye protection, and other safety gear is extremely important. We highly recommend keeping in contact with a licensed water heater maintenance company or contractor.
Check the Pressure Valve
Your water heater (whether gas or electric) is equipped with a safety feature called the temperature pressure relief valve, sometimes called the TPR valve or the T&P valve. This valve will open if too much pressure or heat builds up, preventing damage to the unit or dangerous explosions.
A malfunctioning valve is generally caused by a buildup of residue or sediment which can block the valve’s opening. Check the valve several times a year for optimal performance. This task is easy: first turn off the gas or electricity on your unit and then open and close the valve a few times. Monitor the water flow from the drainpipe because a properly functioning valve will release water when open.
If no water is released, it’s time to purchase a new TPR valve. Water heater maintenance costs are much cheaper than having to purchase an entirely new unit – Make sure to keep up with your maintenance to save money in the long run!
Hot Water Heater Maintenance Flush
Over time, sediment will build up in your water heater’s tank, especially if you have hard water. A lot of damage can occur when these particles are left to sit in the bottom of the tank, as thick layers of sediment make your unit work extra hard to heat the water in the tank. The sediment will also corrode the tank walls over time, eventually causing leaks.
Doing a hot water heater maintenance flush once a year can keep your hot water heater’s tank sediment free. Just flush the sediment out by draining the water from the tank.
Start by shutting off the gas or electricity, a vitally important step for safety reasons. Attach a garden hose to the drain valve (located at the bottom of the tank). The sediment will drain through this hose, so direct it outside, into a floor drain, or into a bathtub. Be careful- the water will be hot! Use a colander to catch the sediment and prevent clogs.
Next, turn off the cold water supply to the tank and run one of the hot water faucets in your house. Open the drain valve and let the tank empty itself. The water that first emerges will most likely be gooey and discolored, but will slowly become clear as the sediment leaves.
If the sediment starts to clog the valve at any time, turn on the cold water in short spurts to blast the gunk away. Once the hot water has drained completely, close the drain valve, partially fill the tank with cold water, and drain it once more.
Repeat this process until the water is completely clear. At that point you can close the drain valve, remove the hose, and turn on the cold water supply. The tank will start to fill, and when water starts coming out of your hot water faucets you can be sure the job is done. Turn on the gas or electricity, and rest easy knowing your water tank is free from sediment.
Water Heater Maintenance: Anode Rod
Water heater tanks are equipped with a metal rod that attracts minerals like calcium. These minerals become the sediment that can corrode the lining of the water tank, so the rod protects the unit by attracting certain minerals and preventing them from depositing on the tank.
Once this rod wears out, so does your water heater preventative maintenance. Those minerals can cause your tank to rust and leak. Inspect the anode rod yearly and replace it every 3-5 years to extend the life of your water heater.
Always turn off the gas or electricity on the unit before attempting to inspect the rod. Draining a few gallons of water can help you check for rust within the tank as well. Loosen the hex nut on the top of your tank and the rod will be directly attached to it.
If large portions of the core wire are visible, or if there is a thick layer of deposit on the rod, it is time to replace it. Luckily a new anode rod can be purchased easily at any hardware story at an affordable rate.
Following a few simple steps will extend the life of your water heater, prevent any dangerous accidents, and keep hot water consistently flowing in your home.
As always, be sure to call in a professionalwater heater maintenance company if you feel overwhelmed or suspect damage has occurred within your unit.
Get Familiar With Your Water Heater Maintenance Schedule
Your water heater loves consistency. Following a routine water heater maintenance schedule will keep your unit working at its best for around 15-years, maybe more!
Your typical water heater maintenance schedule is as follows:
Test the temperature relief valve at least once per year.
Flush your water heater every 4 months.
Clean your water heater tank once per year.
Replace your anode rod every 2-5 years.
For gas water heaters: check the burner every year.
For a more comprehensive water heater maintenance schedule, please refer to your water heater manufacturer’s website and look up the model number of your water heating unit.
Maintain a Relationship With Your Local Water Heater Maintenance Company
Sometimes, water heater maintenance is not a DIY project. If you are struggling to troubleshoot a major issue with your heating unit, or if you do not feel comfortable carrying out the tasks on our water heater maintenance checklist, please call your local water heater maintenance company.
Make sure to do your research and learn all about your local water heater contractor before hiring them. Keeping a contractor that you know and trust in your contact list can be a life saver, especially in a 24 hour emergency situation! Safety always comes first when it comes to maintaining any household appliance, especially your water heater.
The colder months of the year mean that homeowners must provide some extra TLC to their home’s plumbing equipment. Avoiding a winter disaster, such as flooding due to a burst pipe, is ideal for everyone and a few simple steps can go a long way in preventing an expensive or dangerous accident.
While some tasks should be handled by an experienced plumber, there are plenty of simple steps that the average homeowner can take to ensure smooth sailing during the winter season. The time it takes to complete the following tips are worth it in the long run.
Insulate your pipes
Proper insulation will go a long way in preventing frozen pipes, which could burst and flood your home or yard. Foam insulation designed specifically for pipes can be purchased at any major home-improvement store, and when wrapped around pipes this foam will keep everything warm and cozy even in the coldest months. Make sure to prioritize pipes that are located in less insulated locations, such as crawl spaces or exterior walls.
Keep your pipes flowing
The easiest way to keep your pipes from freezing may surprise you, because all you really need to do is use them! Running water through the faucets in your home at regular intervals throughout the winter will help to keep them free from ice blockages. If you have a rarely-used sink in your home and you worry about remembering to use it periodically, allow a slow drip to continue in that particular sink. The money spent on extra water will be negligible, especially compared with the cost of repairing a frozen pipe that has burst.
Pack away hoses and protect hose bibs
Leaving your outdoor hoses attached to the hose bib (the term for an outdoor spigot) is a recipe for disaster. As the temperature drops, the residual water in the hose can freeze and damage the bib. During winter, your garden hose should be drained, detached, and stored away until spring time. Additionally, covering the exposed hose bib and outdoor pipe with foam insulation will protect them from winter’s harsh weather. No one wants to begin spring with a hose bib repair, so protecting any outdoor spigots will ensure a smooth transition into the warmer months.
Drain your sprinkler system
Another important component of outdoor maintenance is your sprinkler system. Because this system is underground, it is often left forgotten as winter sets in. Make sure to drain any residual water from your sprinkler system in order to avoid frozen pipes or damaged sprinkler heads. If you are unsure of how to drain your system, contact your plumber for assistance.
Take care of your water heater
Regular maintenance on your water heater is essential to its longevity. Ideally, having your water heater inspected prior to the cold months is the best, as the unit will work extra hard for your family during the winter. However, if you, like many homeowners, found yourself too busy with the holidays to schedule your unit’s annual check-up, it’s not too late to call your plumber! After all, a malfunctioning water heater is especially inconvenient in the winter when hot water is a necessity.
Improve your water heater’s functionality
Aside from professional maintenance, you can improve the functionality of your water heater during the winter when it has to work extra hard to supply your home with hot water. If you notice that it has been harder to get your showers as steamy as they once were, you can easily increase the temperature on your water heater.
Be careful, however, not to heat it above 125°F to avoid an accidental burn. Another great way for larger families to optimize their water heater is by spacing out hot showers. A ten-minute interval between showers will provide steady water pressure and the perfect temperature every time.
Keep the house warm
While many people are tempted to save money by allocating the heat to certain rooms, it is actually best to let the warm temperature spread throughout your whole house. Isolating certain rooms from the warmth can lead to frozen or burst pipes. So, while it may seem like a waste of money to heat that room no one ever goes in, the alternative could be a plumbing disaster.
Following these simple tips will protect the plumbing in your house throughout the entire winter, providing the perfect recipe for a warm and happy family.
The beginning of the New Year comes with resolutions of all kinds: weight loss, eliminating bad habits, pursuing abandoned hobbies, and more.
While New Year’s resolutions come in many varieties, the most common tend to center around healthy living or personal finance. A new year is a chance to reinvent yourself physically, emotionally, or even financially.
These new goals often result in your kitchen receiving much more attention than before- from attempting to eat healthy foods for your physical well-being, to committing to stay home and cook more often, thus saving money that was previously spent in restaurants.
Regardless of the reason, extra time in the kitchen often means that your garbage disposal can receive quite a beating in the first few months of the year. While it may seem like an easy way to get rid of any and all waste in the kitchen after cooking dinner or making that morning smoothie, your garbage disposal isn’t meant to handle all types of waste.
Increase the life-span of your garbage disposal by keeping these things out of it:
Grease/Oil
Families who make a commitment to eat at home more often try to replicate the kid’s favorites, including fries and hamburgers. These fun meals all result in the same thing: grease. For the sake of your plumbing, pour grease or oil into an old can before tossing it in the trash. Once these substances cool down, they harden into sticky goo that can wreak havoc on your garbage disposal and pipes.
Fibrous Foods
Eating healthy often results in lots of fibrous foods, such as kale, celery, carrots, asparagus, and artichokes. Putting fibrous foods like these into your garbage disposal is a mistake; the fibers can get wrapped the blades, damaging the appliance.
Egg Shells
Many people believe that egg shells are good for the garbage disposal because they supposedly sharpen the blades. Don’t listen to this rumor; throw your egg shells in the garbage, because the slippery membrane inside the shell can get caught in the disposal, damaging the motor. Aside from this, once egg shells are crushed they tend to take on a sand-like consistency, which can clog pipes.
Starchy Food
Starchy foods like pasta and rice tend to expand when wet. Not only this, but their texture can turn into a gelatinous, gooey mess that will easily stick to your pipes and garbage disposal blades. Throw leftover starches in the trash to avoid a damaged garbage disposal or a clogged sink.
Bones and Pits
Chicken bones, fruits pits, and other hard materials are too tough for the blades of your garbage disposal and can easily damage the motor. Always throw these in the trash can.
Coffee Grounds
While these may make your sink smell nice, the leftover sediment can clog the blades of your disposal as well as harden in your pipes. Orange or lemon peels are a great alternative for keeping the drain smelling fresh, so empty that French-press into the trash to avoid a plumbing mishap.
Non-Edibles
The garbage disposal should be used solely for food items. Treating your disposal like a trash can will only shorten its life and increase your chances of needing a major repair. Items like cigarette butts, rubber bands, glass, string, paper, and more can easily damage the blades and motor of a garbage disposal. As a general rule, if you wouldn’t feed it to your kids, don’t put it down the disposal!
Cleaning Supplies
Harsh chemicals like lye, bleach, and drain-opener should not be poured down the garbage disposal. The corrosive properties of these cleaners can greatly damage your garbage disposal. Should your kitchen sink become clogged, consult a professional plumber rather than resorting to a chemical cleaner.
Other Helpful Tips
Aside from disposing of the correct food items, there are some easy tips that can improve the functionality and extend the life of your garbage disposal. Never put large amounts of food into your disposal all at once, instead feed in a little at a time so the disposal has a chance to do its job without becoming overloaded.
Additionally, always run water through the disposal when putting food in it. The best way is to run water first, feed in the food, and then allow the water to continue running for fifteen seconds. This allows any remaining food particles to be flushed from the blades. Cold water is best!
As you settled into new habits and routines this New Year, treat your garbage disposal well to ensure a happy kitchen and a damage-free kitchen sink!
You have probably heard this statistic about water: it covers over 70% of the earth. Hearing this makes most people assume that there is plenty to go around, but this isn’t necessarily the case. You see, of that huge amount of water on earth, over 97% is salt water that cannot be consumed by people. This leaves us with just over 2% as fresh water, much of which exists as frozen icecaps or lies so far below the surface of the earth that humans cannot access it.
What Does This Mean for People?
When you get right down to it, less than 1% of the water on earth is available to be used by people. While water is a renewable resource, that small amount of available water is being used up faster than rain and snow can replenish it.
What Can We Do?
The EPA estimates that the average American family uses over 300 gallons of water each day, and this statistic only includes water used within the home. If every family in America made a pointed effort to conserve more water, we could save not only money, but a precious resource that may not always be readily available. Having low-flow appliances and fixtures installed in your home is a fantastic way to save water without having to change your daily habits. Consider these changes:
Faucets
If an average faucet in your home was run for 4 minutes each day, it would use roughly 4,000 gallons of water per year. On the other hand, a low-flow faucet would use 3,000 gallons in the same time span. A water-saving faucet could save over 1,000 gallons year, but that figure is probably even higher considering most homes use multiple faucets for more than a few minutes each day.
Toilets
A standard toilet that is flushed 15 times per day has an average water consumption of 33,000 gallons each year. That’s a lot of water! By switching to water-saving toilets, your home could conserve thousands of gallons of water annually, as low-flow toilets tend to use only 9,000 gallons a year. Think of what a great impact this change would make not only on the world’s resources, but also on your water bill.
Shower Heads
A standard shower head, used for 15 minutes per day every other day, uses roughly 19,000 gallons of water in a year. That statistic, when put in the perspective of an average American household that will use the shower multiple times each day, is staggering. Consider a water-saving shower head, which cuts water consumption by more than 50%, at 9,000 gallons used per year.
Washing Machines
Many people forget appliances like the washing machine when they are considering water conservation, but installing a water-saving washing machine can go a long way in protecting earth’s valuable resources. A standard machine, if used twice a week, will use roughly 5,000 gallons of water a year, whereas a water-saving machine will use only 3,000. Once again, consider these figures in the framework of the average American family, many of whom use their washing machine far more than twice a week.
Taking these steps to conserve the earth’s fresh water requires no change in your daily routine, but will have a huge impact on the environment. Using all of the water-saving fixtures outlined above, your home could save roughly 40,000 gallons of water each year! If not for the earth, then at least consider the money that will be saved on your family’s water bill each month.
…or you’ll be the homeowner giggling like a fifth grader at the local hardware store!
Plumbing is a complicated process with more terms, gadgets, and appliances than most people can remember, but the following seven terms should be easy to keep in mind since you probably already use them.
Learning to redefine a few of the words in your existing vocabulary can go a long way in increasing your plumbing knowledge.
Coupling
While not nearly as romantic as it sounds, does involve the joining of two things! In the case of plumbing, a coupling is the short piece of pipe that joins two longer pipes together. Also know as a coupler, it generally has the same style of socket on each end. If each end has a different type of socket, this short pipe is usually called an adaptor rather than a coupling.
Snake
Easily confused with its reptilian name-sharer, a snake is actually just a long metal coil that can be inserted into a drain and rotated to remove clogs. The snake is best on moderate to severe clogs and is generally the next step after a plunger fails to solve the problem. Warning: it is best not to tell your spouse you have a snake in the bathroom!
Bonnet
The term bonnet may have you picturing Little House on the Prairie, but in plumbing a bonnet is part of a compression valve assembly. It works by keeping the valve in place and preventing leaks, thus saving you money!
O-ring
An O-ring is a simple but extremely important piece of plumbing equipment. The name might give you a craving for greasy, fried onions, but an o-ring is simply a circular piece of rubber that is placed around a valve to create a water-tight seal.
This ring should be the first place you check when trying to diagnose a water leak, as replacing it could solve the issue immediately.
Flapper
Contrary to the word’s historical connotations, don’t expect a woman from the 1940’s to greet you when you head to the hardware store to buy a flapper! In plumbing terms, a flapper is the piece of rubber in the bottom of your toilet tank that lifts to allow flushing and then reseals as the tank refills.
The flapper covers the valve at the bottom of the tank until the flushing lever is activated, at which time the flapper lifts and the water rushes from the tank, through the valve, and into the toilet bowl.
Ballcock
A ballcock is essential to any functioning toilet, although the name may leave you blushing at Home Depot. This mechanism controls the water flow into the toilet tank and prevents overflow. There are several different types of ballcock mechanisms on the market today, so homeowners should do their research regarding the best one for their home.
Nipple
In plumbing, a nipple is a very short section of pipe that has threading on each end. It is used to join two pipe sections, or even two couplings, together. Despite the funny name, pipe nipples are very common pieces of hardware in plumbing and home construction. They come in a large variety of styles and sizes, so you can feel confident that you will find the one you need at any hardware store.
And just like that, your internal plumbing-dictionary just got a little bit bigger! Learning the ins and outs of home repairs like plumbing can seem daunting, but starting with the words you already know and redefining them in a new setting is a perfect way to start.
There are few home disasters that can be quite as devastating as water damage, both to the condition of your home and your wallet.
Something as simple as a dripping faucet can increase your water bill by an exorbitant amount, and heaven forbid you have a full-blown busted pipe that destroys your flooring or causes ruination to the foundation of your home.
The positive aspect of a water leak (yes, there can be a silver lining to home repair!) is that unlike other sinister accidents that are much harder to notice, such as carbon dioxide leak, water damage is easily noticed and thus can be corrected in a timely manner.
You will have far less damages to deal with if you put a stop to the leak and repair the faulty pipe or equipment in a timely manner.
Signs Your Home Has a Leak
The tell-tale signs of leaks are hard to miss, which is great considering the damage water can do in just a few days, or hours, time. Being aware of a few things around your home will go a long way in nipping any leaks in the bud.
– An increase in your water bills, especially the cost jumps drastically from the previous month
– Muddy patches in the yard around your home
– Soft or sagging floors
– A persistent musty smell in your home
– Visible mold, especially in the rooms of your home that use water
– Stained ceiling or walls, especially when stains reappear after painting
– Misshapen walls
– Bubbles forming underneath wall paint or wallpaper
These signs could all mean a leak that will continue to damage your home until dealt with. Be especially wary of leaks and signs of water damage in your kitchen, bathrooms, and laundry room as they use the most water and appliances. Leaky or busted pipes are most often found in basements or under the foundation of your home.
Health Hazards
No one wants to pay for damages caused by water, but your finances may not be the only victim of unrepaired leaks. Your health, and the health of your family, can fall victim to water damage as well.
– Mold: Stagnant water, or continually damp walls and floors, lead to mold growth in your home. Mold doesn’t just smell bad; it is hazardous to your health in a variety of ways- some merely annoying and others possibly fatal. Mold can irritate existing allergies or cause a person to develop new allergies over time. Prolonged exposure to mold has been known to cause headaches, dizziness, and, most dangerously, respiratory issues. The very young and very old are especially susceptible to mold-related illnesses.
– Bacteria: A leak that stems from a sewer pipe can easily bring harmful bacteria into your home. Even worse, your water supply can become infected, making it unsafe to drink or bathe in. A sewer leak is no laughing matter, and the health concerns far outweigh the financial ones.
Diagnosing the Problem
So you’ve noticed the telltale signs of a leak in your home. Maybe there is a persistent muddy patch in your lawn, or the wall in your living room has started to bubble and warp.
You know there is an issue, but you can’t seem to find it on your own, as the leaking pipe or faucet isn’t visible to the naked eye. At this point, it’s probably time to call a plumber, as they have several excellent methods of hunting down that pesky leak.
– Some plumbers detect leaks by filling your pipes with hydrogen. They have special machines that track the flow of the gas, and can pinpoint the direct location of the leak.
– Similar to an endoscopy in humans, a camera can be inserted into pipes in your home in order to search for a leak.
– Waves from a radar machine can be used to hunt for an underground leak in the foundation of your home. A geophone is a device that amplifies sounds from underground and can be used to listen for dripping or running water, indicating a leak.
Regardless of how a leak is detected, it is imperative that it is corrected in timely manner in order to best protect your health, home, and finances. Don’t let signs of leaking water go undiagnosed, as you will end up in a far worse situation in the long run.
If you have any leaks at home and you need assistance, please give us a call at (805) 928-2511 — we’re available 24/7 for all your plumbing needs.
Another summer has come to a close. The kids are back in school, vacations are finished, the pool is covered, and everyone is searching for the first signs of fall in the air.
The close of such a busy season often brings more free time, meaning homeowners everywhere have a few more minutes to spare on plumbing maintenance.
So what should be on your plumbing checklist as summer fades away and cooler temperatures set in? Check out this to-do list and keep your home running smoothly all year long:
Inspect your Hoses and Hose Bibs
Hoses get a workout over the summer, whether you’ve been filling the pool, watering the garden, or spraying the kids down in the backyard. All that wear and tear can take a toll on your hoses and hose bibs, causing cracks or leaks which can lead to water damage and high water bills.
A great way to inspect your hose bib is by covering the opening of the faucet with your thumb and turning the water on. A great build up of pressure, and the inability to hold all that water back, means your hose bib is in working order.
The lack of any pressure build-up can mean there is a leak somewhere, and it may be time to call in a professional. The end of summer is the perfect time to check on these items because they will largely go unused -and be forgotten- over the colder months. As always, a frost-proof hose bib is an excellent choice if you live in a cold climate.
Water Heater
What better time to inspect your water heater than when it has been sitting idle for several months? Flushing the tank once a year and keeping an eye on your water heater’s anode rod can greatly extend the life of the unit.
The anode rod protects the water heater from corroding, and left alone for too long can take a toll on the appliance. Taking the time to correct any issues now can save your family a lot of trouble come winter time. After all, no one wants to be stuck taking a cold shower in the middle of December!
Sewer Lines
The warm weather of summer meant lush greenery and tree growth in your yard, and with this growth comes the danger of roots interfering with sewer lines. Make sure to cover any exposed piping to protect it from cold weather, and do a thorough check for cracks or damage.
A break in one of these lines could be devastating to your yard or home, so having them checked at the end of the summer is always wise. A hairline crack in the warm months could easily turn into a burst pipe in freezing temperatures.
Appliances
Vacations, swimming, and the intense heat of summer mean more wear and tear on your washing machine. Picnics, pot lucks, and barbecues mean dirty dishes and more usage of the dish washer.
It’s true- your appliances sure take a beating in the summer time! A thorough check that they are working properly with no leaks or cracks will keep your appliances running strong all year.
Inspect the hoses behind your washing machine for damage, because a cracked hose means a flooded laundry room and a headache for you.
Make sure to inspect all gaskets on your dishwasher door for cracks, check for rust, and regularly clean any filters, screens, or sprayer arms to keep the machine running well for years to come.
Conclusion
Taking a few minutes to check these items and maintain the plumbing in your home can save you money and hours of potential damage-control in the future.
By assuring that everything is running smoothly at the end of summer, you can ensure a happy, disaster-free winter for your home. Let your family enjoy the season and forget about busted pipes, cold showers, and leaky appliances.
Being one step ahead of these disasters is the best way to keep your home’s plumbing in prime shape.
Green Plumbing Practices; Grey Water, Stagnant Water, and Sustainability
California residents may be pleased to hear that water conservation efforts are making a notable and positive difference, especially in urban areas across the state. Keeping track of water usage from county to county is now an absolute necessity, and the people of the Golden State are acknowledging the severity of it all.
The State Water Resources Control Board indicated that during the month of May this year, water consumption dropped by nearly 29 percent. Even though this significant decrease is welcome news, the situation is far from being resolved. The remaining days of summer will be the true test, as the temperatures begin to rise statewide and the demand for water is likely to follow suit.
Zierman Plumbing and Heating is playing an important role in water conservation efforts by urging all customers to consider their options. A few cost-effective methods exist, which may involve acquiring a few three-to-five gallon buckets to recycle runoff water from kitchen sinks, bathtub/shower enclosures, and external washing machine exhaust hoses.
Also known as grey water, excess amounts can be used in place of running sprinkler systems, watering individual potted plants, and harder to reach areas that would otherwise require tapping into your main water supply. Recycled grey water is safe to use in your garden and lawn areas, and you’ll likely see a reduction in your water costs as well. Most utility/water bills will have a section that shows overall water usage for one-to-two month cycles, and you may be surprised to find out how much water and money you’ll likely be saving thru conserving and recycling.
Washing machine sewer hookups can also be redirected towards vulnerable areas in your yard; those who have septic systems can also benefit from the redirect method; grey water filling up septic tanks can become costly over time. An average load of laundry requires anywhere between 10 to 20 gallons that can be used elsewhere as grey water.
It’s also important to reuse standing water within a 24 to 48 hour period. The standing water itself can become infected with certain types of bacteria if left alone for too long, which can cause a number of water-borne contagions to form. Also referred to as stagnant water, many different hazards both inside and outside your home can develop. Inside-the-home stagnant water can create airborne mold spores that can affect you and your family’s respiratory systems, while mildew deposits are capable of spreading inside the structure if not taken care of in a timely fashion.
Aside from learning the ins and outs of water treatment and conservation, it’s also a good idea to have some sort of filtration system in place. Although tap water is considered safe to drink, installing a whole house water filter setup can virtually eliminate the chlorine factor, which is something that Zierman Plumbing is more than familiar with. If you have any additional questions regarding water conservation and/or recycling it safely, we’re always a phone call away.

 Zierman Plumbing